
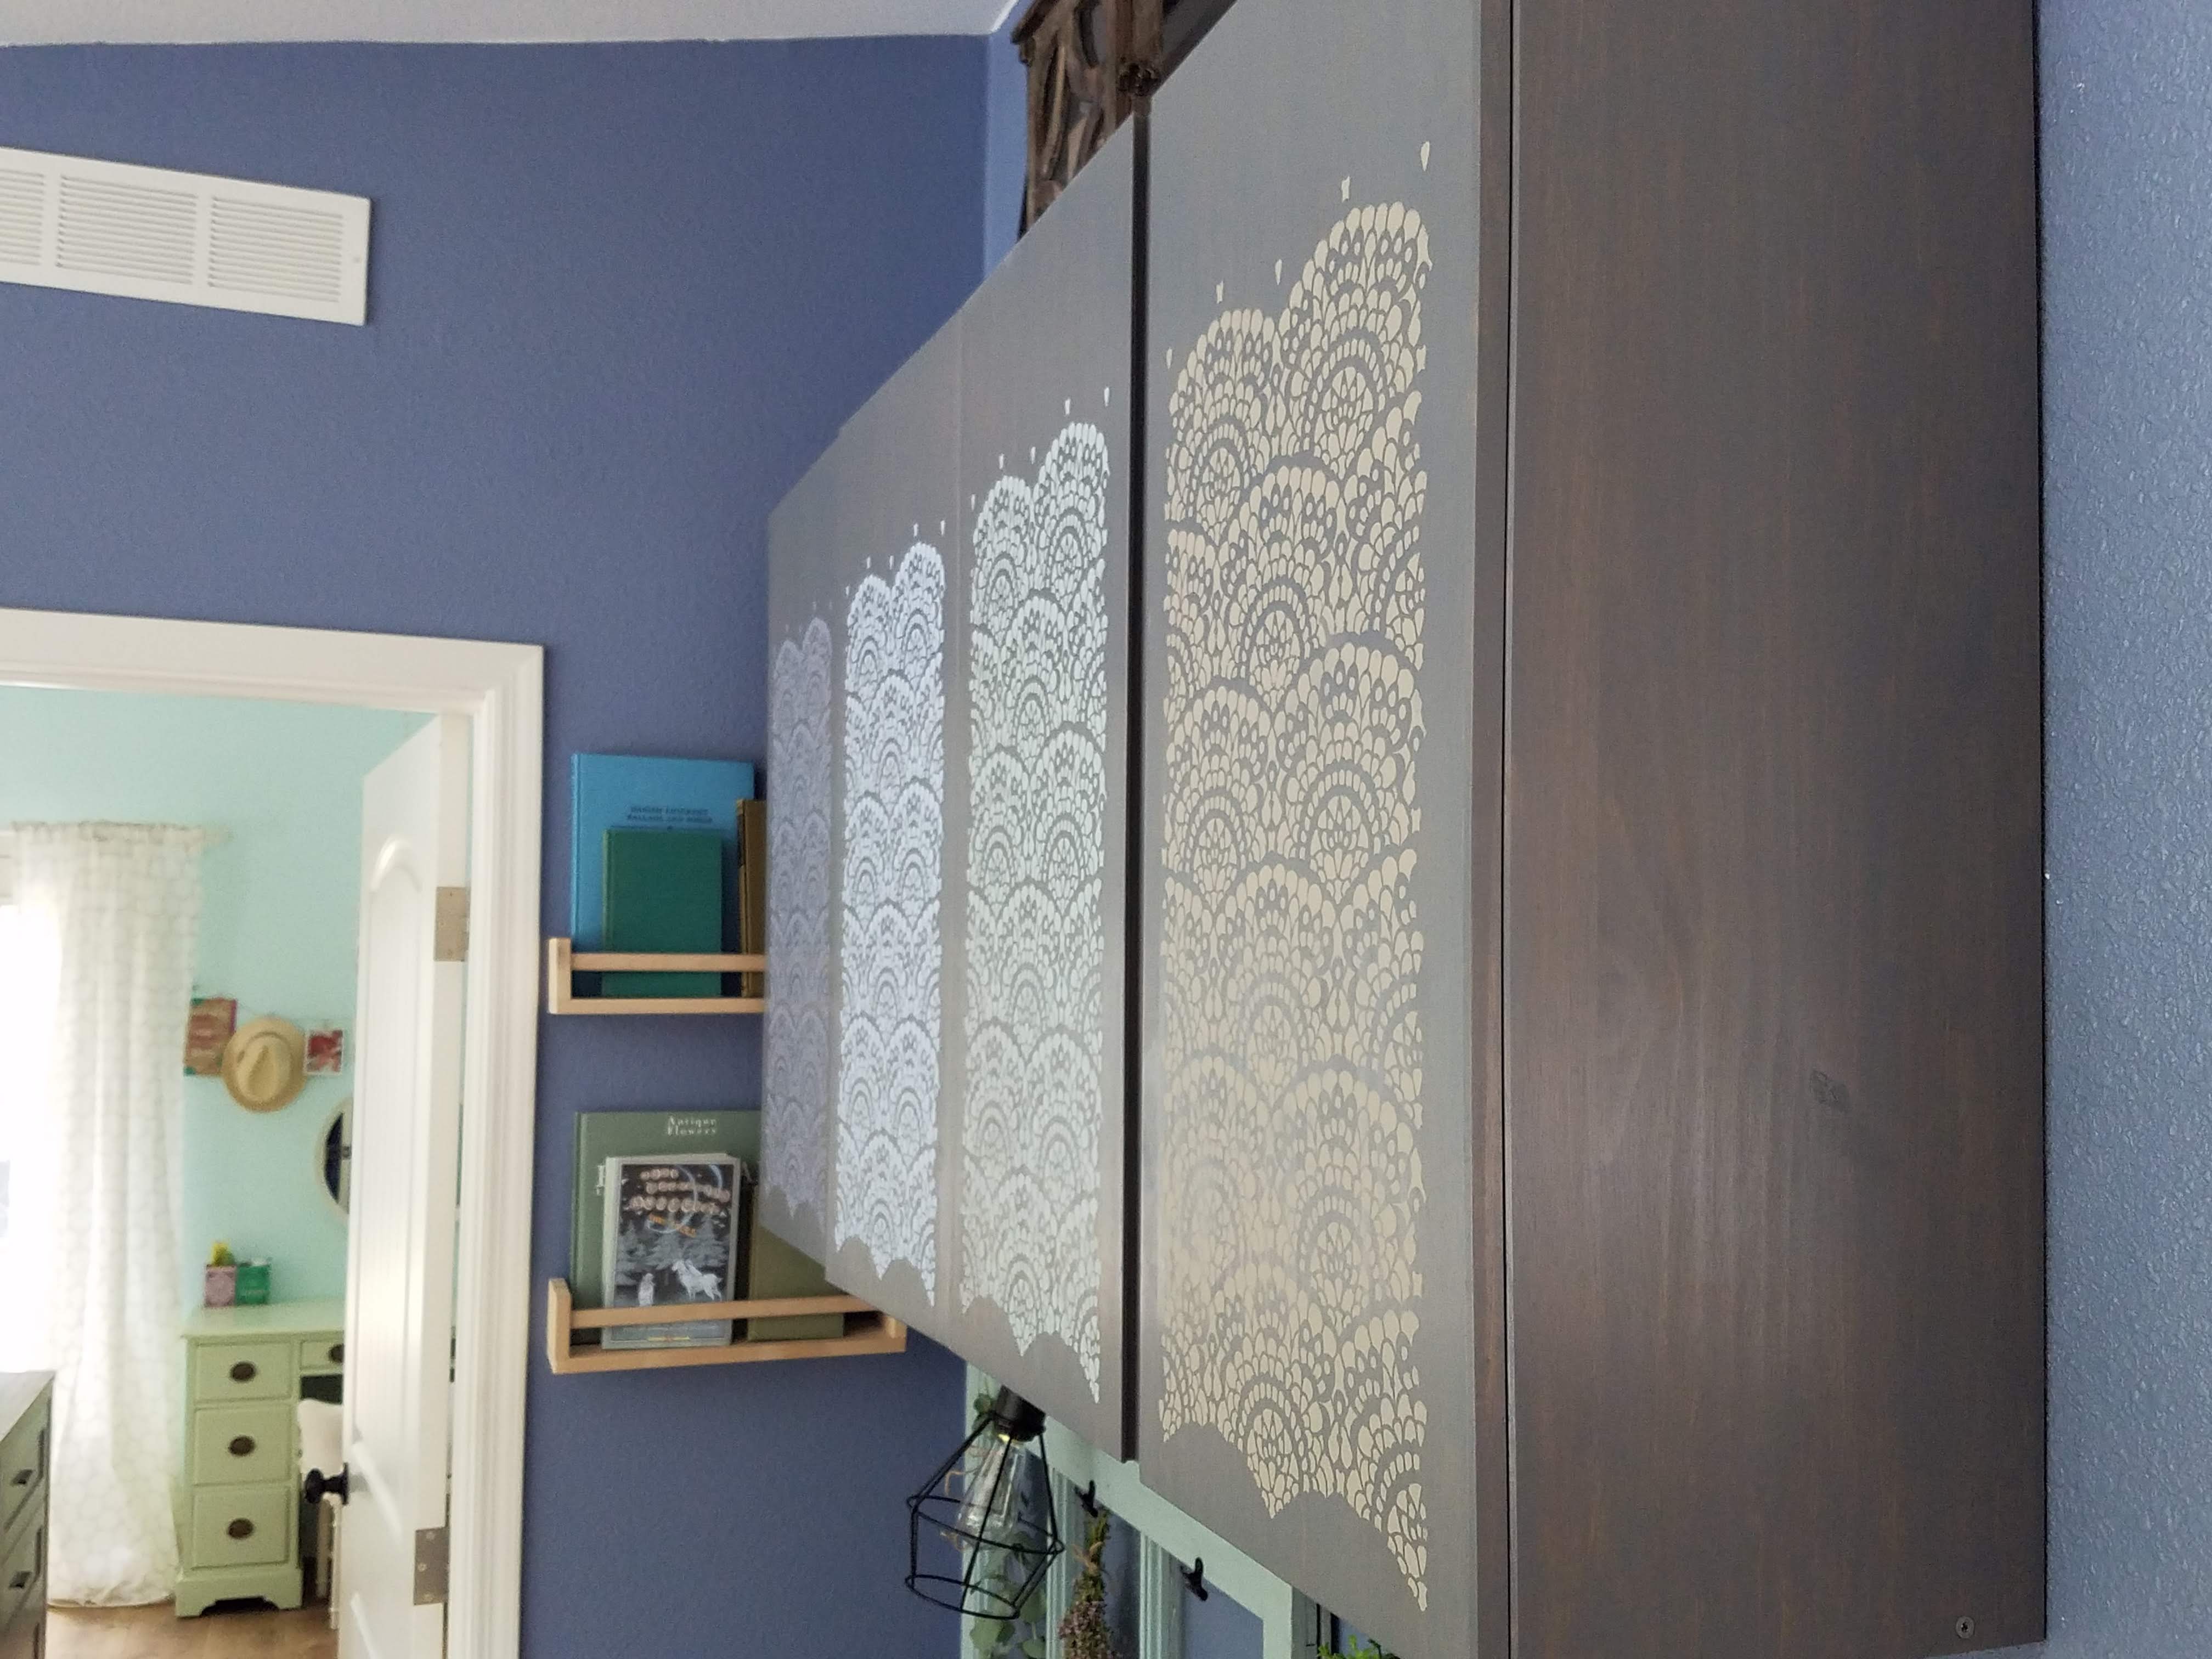
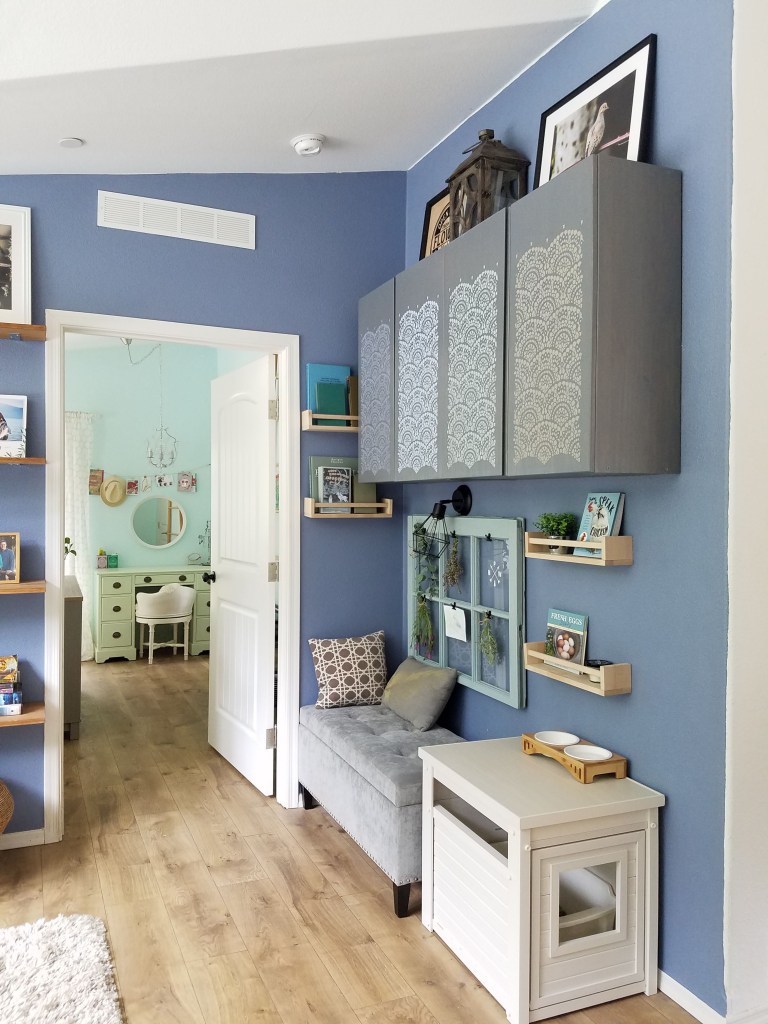
In my last post I wrote about the reading nook I created in an empty corner of our living room. Part of that project involved staining and stenciling these basic IKEA cabinets. I knew I wanted to make use of the wall for storage, but I wanted said storage to add some color and texture to the space as well. The stenciling was a fun and fairly easy project. I think it adds a personal, creative touch and makes the cabinets so much more interesting than if they had just been painted a flat block of color.

The cabinets we used were these unfinished pine IVAR cabinets from IKEA. I knew I wanted to stencil them but I didn’t have a clear idea in mind for a color scheme, so I started off by staining them with some summer oak stain that I had left over from another project. After my wife helped me hang them on the wall, the color looked all wrong! It was way too warm and yellowish and clashed with all the other colors in the room. Oops. But once they were on the wall it was easier to figure out a color scheme that would look better. I was able to re-stain them with a darker grey stain that I got at Home Depot–and I didn’t even have to take them off the wall to do it!
Once I had stained the cabinets grey, I ordered a stencil from Royal Design Studio. The one I chose is called the Spanish Lace Scallop furniture stencil, but they have all kinds of stencils to fit every style. This stencil was the right size to fit 3 vertical repeats on each of my cabinet doors.

I also ordered some Annie Sloan chalk paint from the same website. For three of my colors, I got the little sample sized cans. For the fourth color, I got a full-sized 1 quart can because I’m planning to use it for another project I have in the works. The sample sized pots were more than large enough for this project. I only used maybe a third of each small pot, so I’ll have plenty left over for future projects. Which is good, because this stuff ain’t cheap! But I love that it doesn’t require sanding or priming, is easy to clean up afterwards with water, and doesn’t have that awful chemical wet paint smell. It is also great for layering as much or as little paint as you like to achieve an airy or more solid pattern. And of course you can distress it afterwards, though I didn’t do that in this project.

To do the stenciling, you simply tape the stencil in place, dip your brush in some paint, blot it on a stack of paper towels, and “pounce” the brush over the stencil pattern until you get the effect that you want. In other words, gently tap the end of the brush flat against the surface rather than painting with strokes. To avoid drips, make sure you don’t use too much paint. Then carefully peel off the stencil and move it up to the next spot. It took me a couple of hours to finish the stenciling, but put on some music and have fun with it!

There were a few times that I accidentally applied too much paint and when I removed the stencil, part of the pattern was messed up. It worked well to use a cotton cue-tip dipped in some water to gently wipe off the excess paint and fix the pattern. I also cleaned the brush and stencil in the sink with warm water each time I switched to a new color.

A lot of people apply wax on top of chalk paint to protect it from rubbing off over time, but I decided not to do that with this project. I don’t think the surfaces of the cabinets will be handled very much, since you naturally open the doors at the bottom where there isn’t any paint.
I love how the colors and pattern of this stencil project turned out. It really turned the plain IKEA cabinets into functional art for our home. Stenciling entire walls is such a laborious undertaking, but I found stenciling a smaller piece of furniture like this to be really fun. I’m sure I’ll be tackling some more furniture stenciling projects in the near future. 🙂


1 Comment