
Our house has a lot of open shelving. This is great for books and decor, but over time it can start to look really cluttered. I like to use baskets on open shelves for a cleaner look, but baskets can be so expensive! Coiled baskets are an ancient technique made easier with the use of cotton clothesline and modern sewing machines. This was my first attempt at rope baskets, so I’m certainly no expert. They were a bit more time-consuming and monotonous than I expected. Do not attempt this project when you are pressed for time, or sleepy, or grumpy, or hungry… the motion of sewing in one straight line, around and around, seemingly forever, will really put you in a trance. And if you blink for a second too long, it’s easy to veer off course and end up with a basket full of holes! The freeform finishing touches that I added were fun and creative, though, and I’m sure that now that I’ve started getting the hang of it, I’ll be making more of these baskets in the future.

To make these baskets, you will need a sewing machine, plenty of natural-colored thread, and plain cotton clothesline (I used 3/16 inch diameter). For my largest basket (the round one on the right in the photo above), I used an entire 100-foot skein of clothesline. I would recommend starting with a smaller, round, shallow basket. It will be easier to grapple with, take much less time to complete, and you’ll be able to get at least two baskets out of one skein.
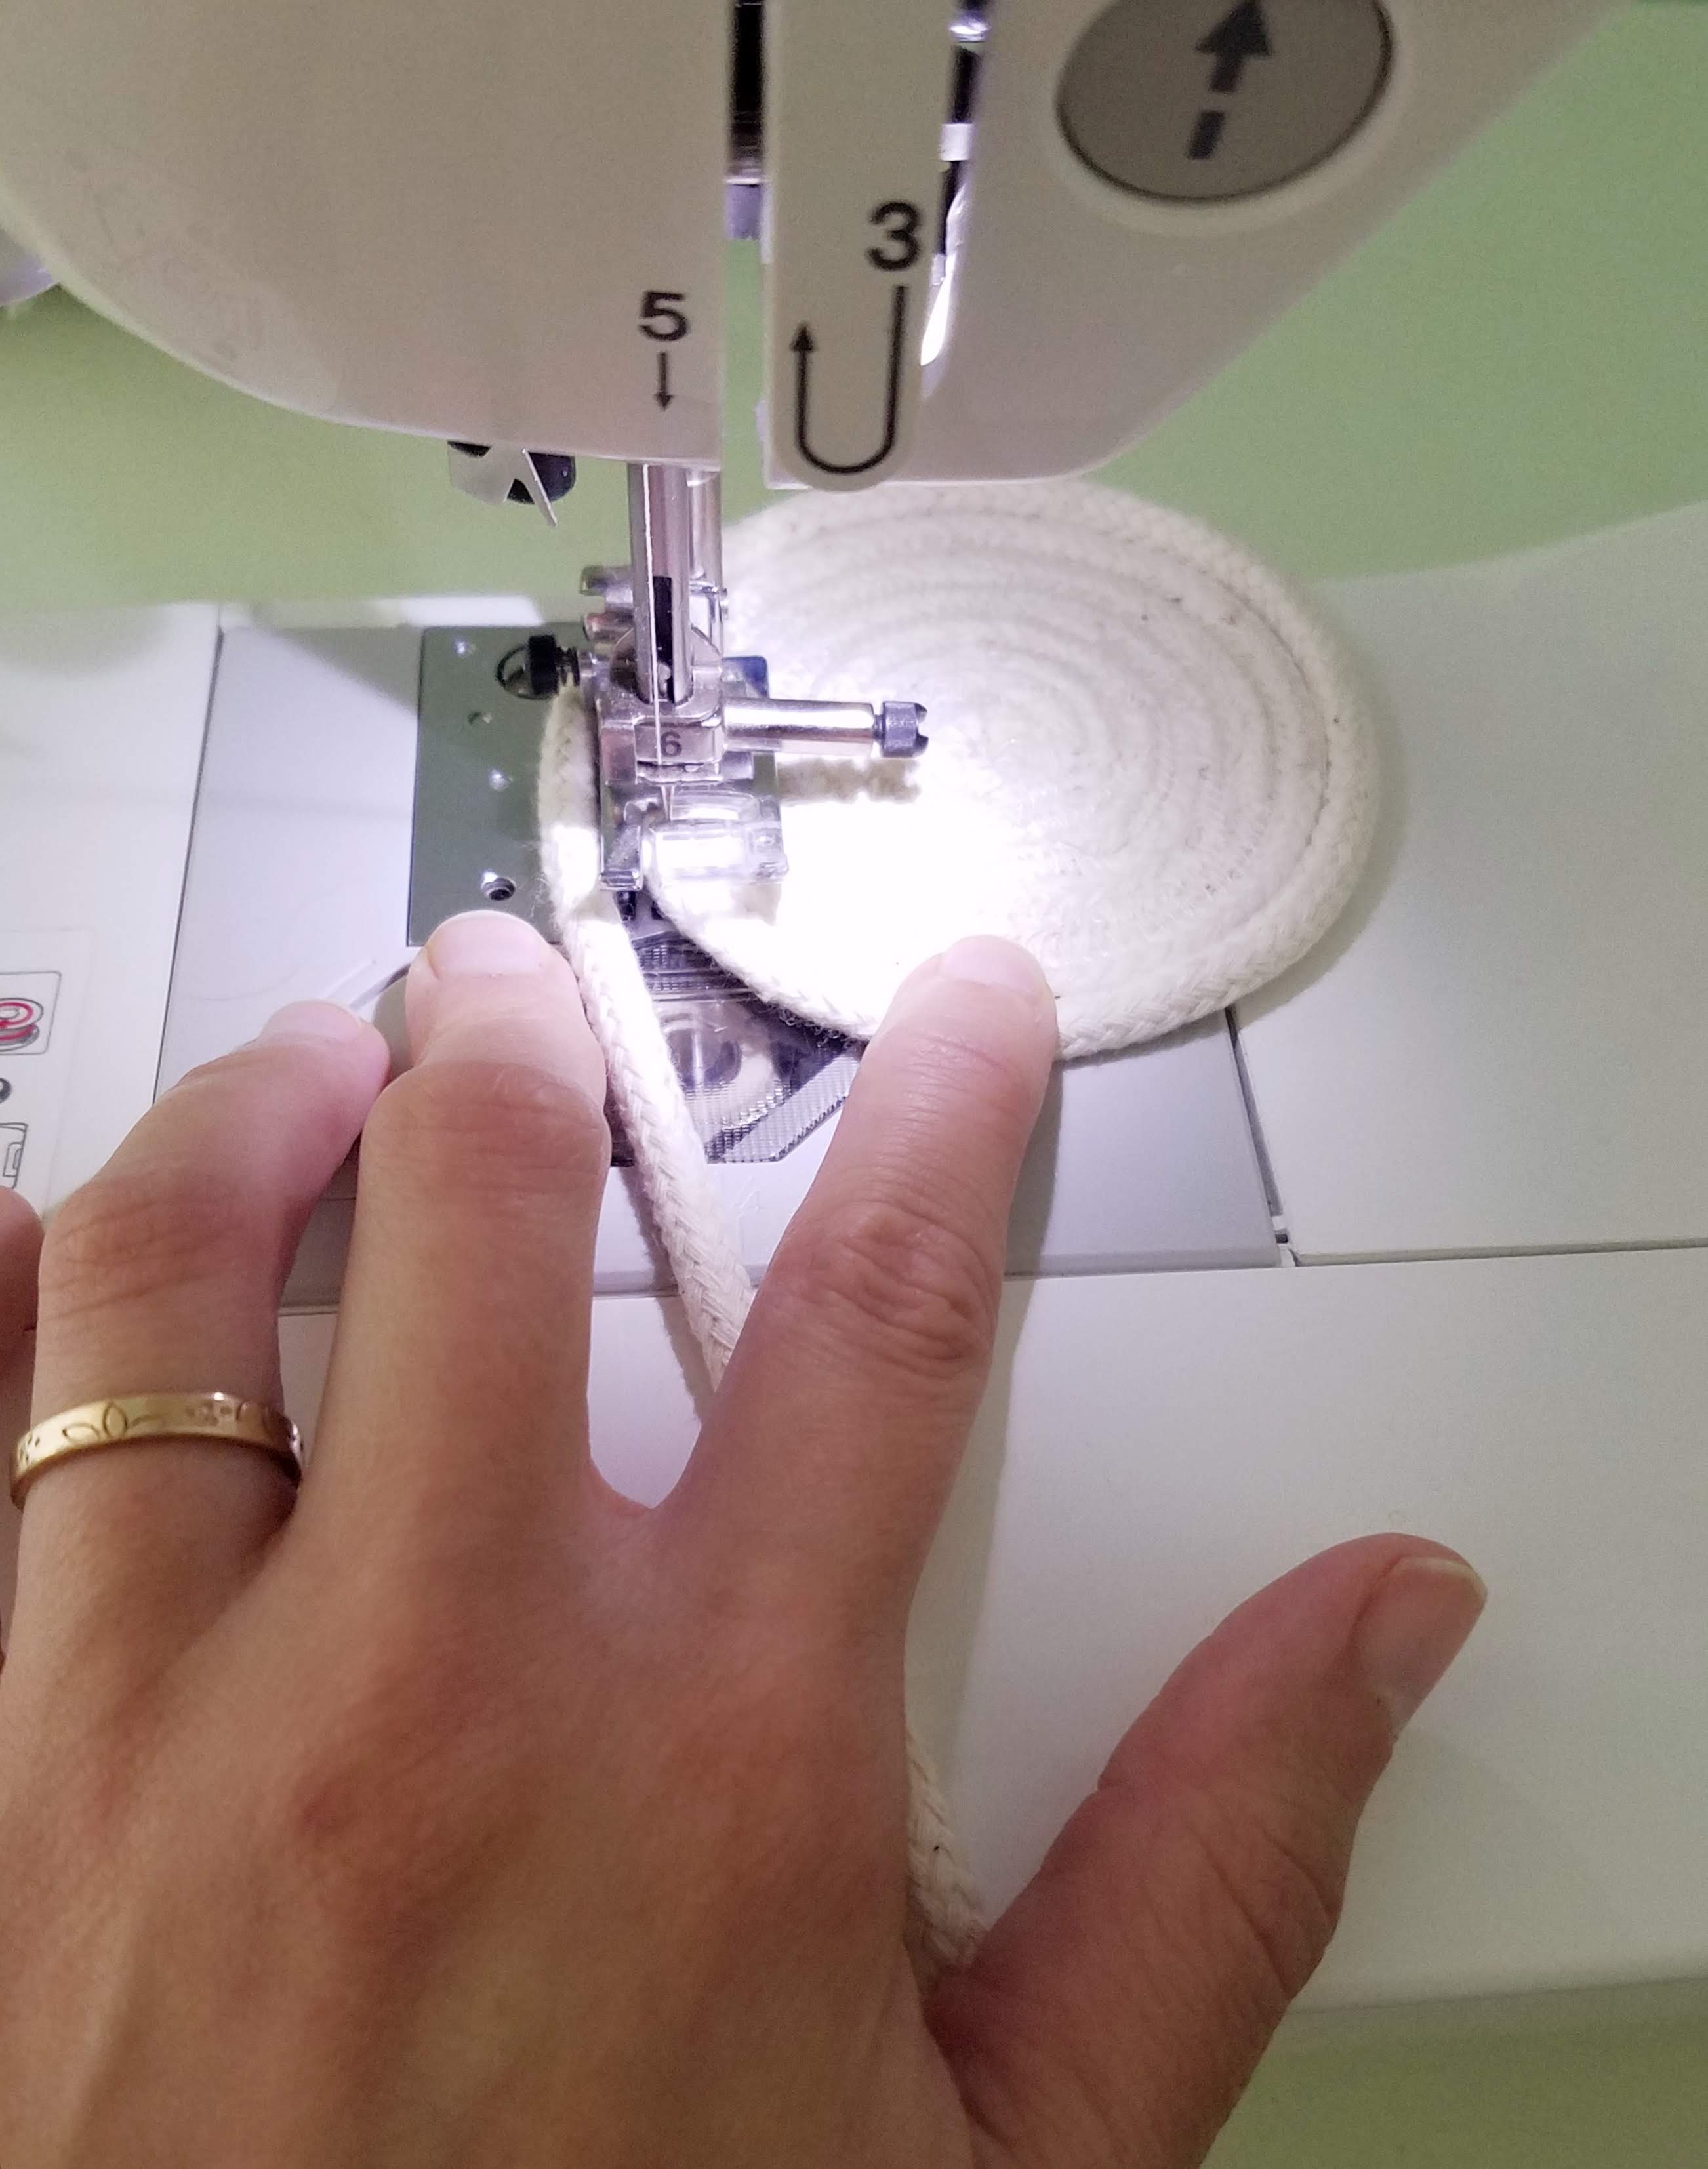
To begin sewing your basket, set your sewing machine to a zigzag stitch with a width of 5mm and a length of 2mm. Slowly begin sewing your rope in a spiral. It is pretty tricky to get the center of the spiral going, so go slow and stop every couple of stitches with the needle down in order to pivot. It will go much faster once the spiral is a more manageable size. Tip: Focus on feeding the center join of the two ropes into the middle of your sewing machine foot. This will ensure that each stitch catches some of the rope from either side.

Once your spiral reaches the size you’d like the basket base, turn the spiral upright and continue sewing with the base held vertical. This will create the sides. The sides will tend to taper out–if you want them to be more upright or to taper inwards, like my tall vase-shaped basket, experiment with pulling gently on the main cord as you sew.

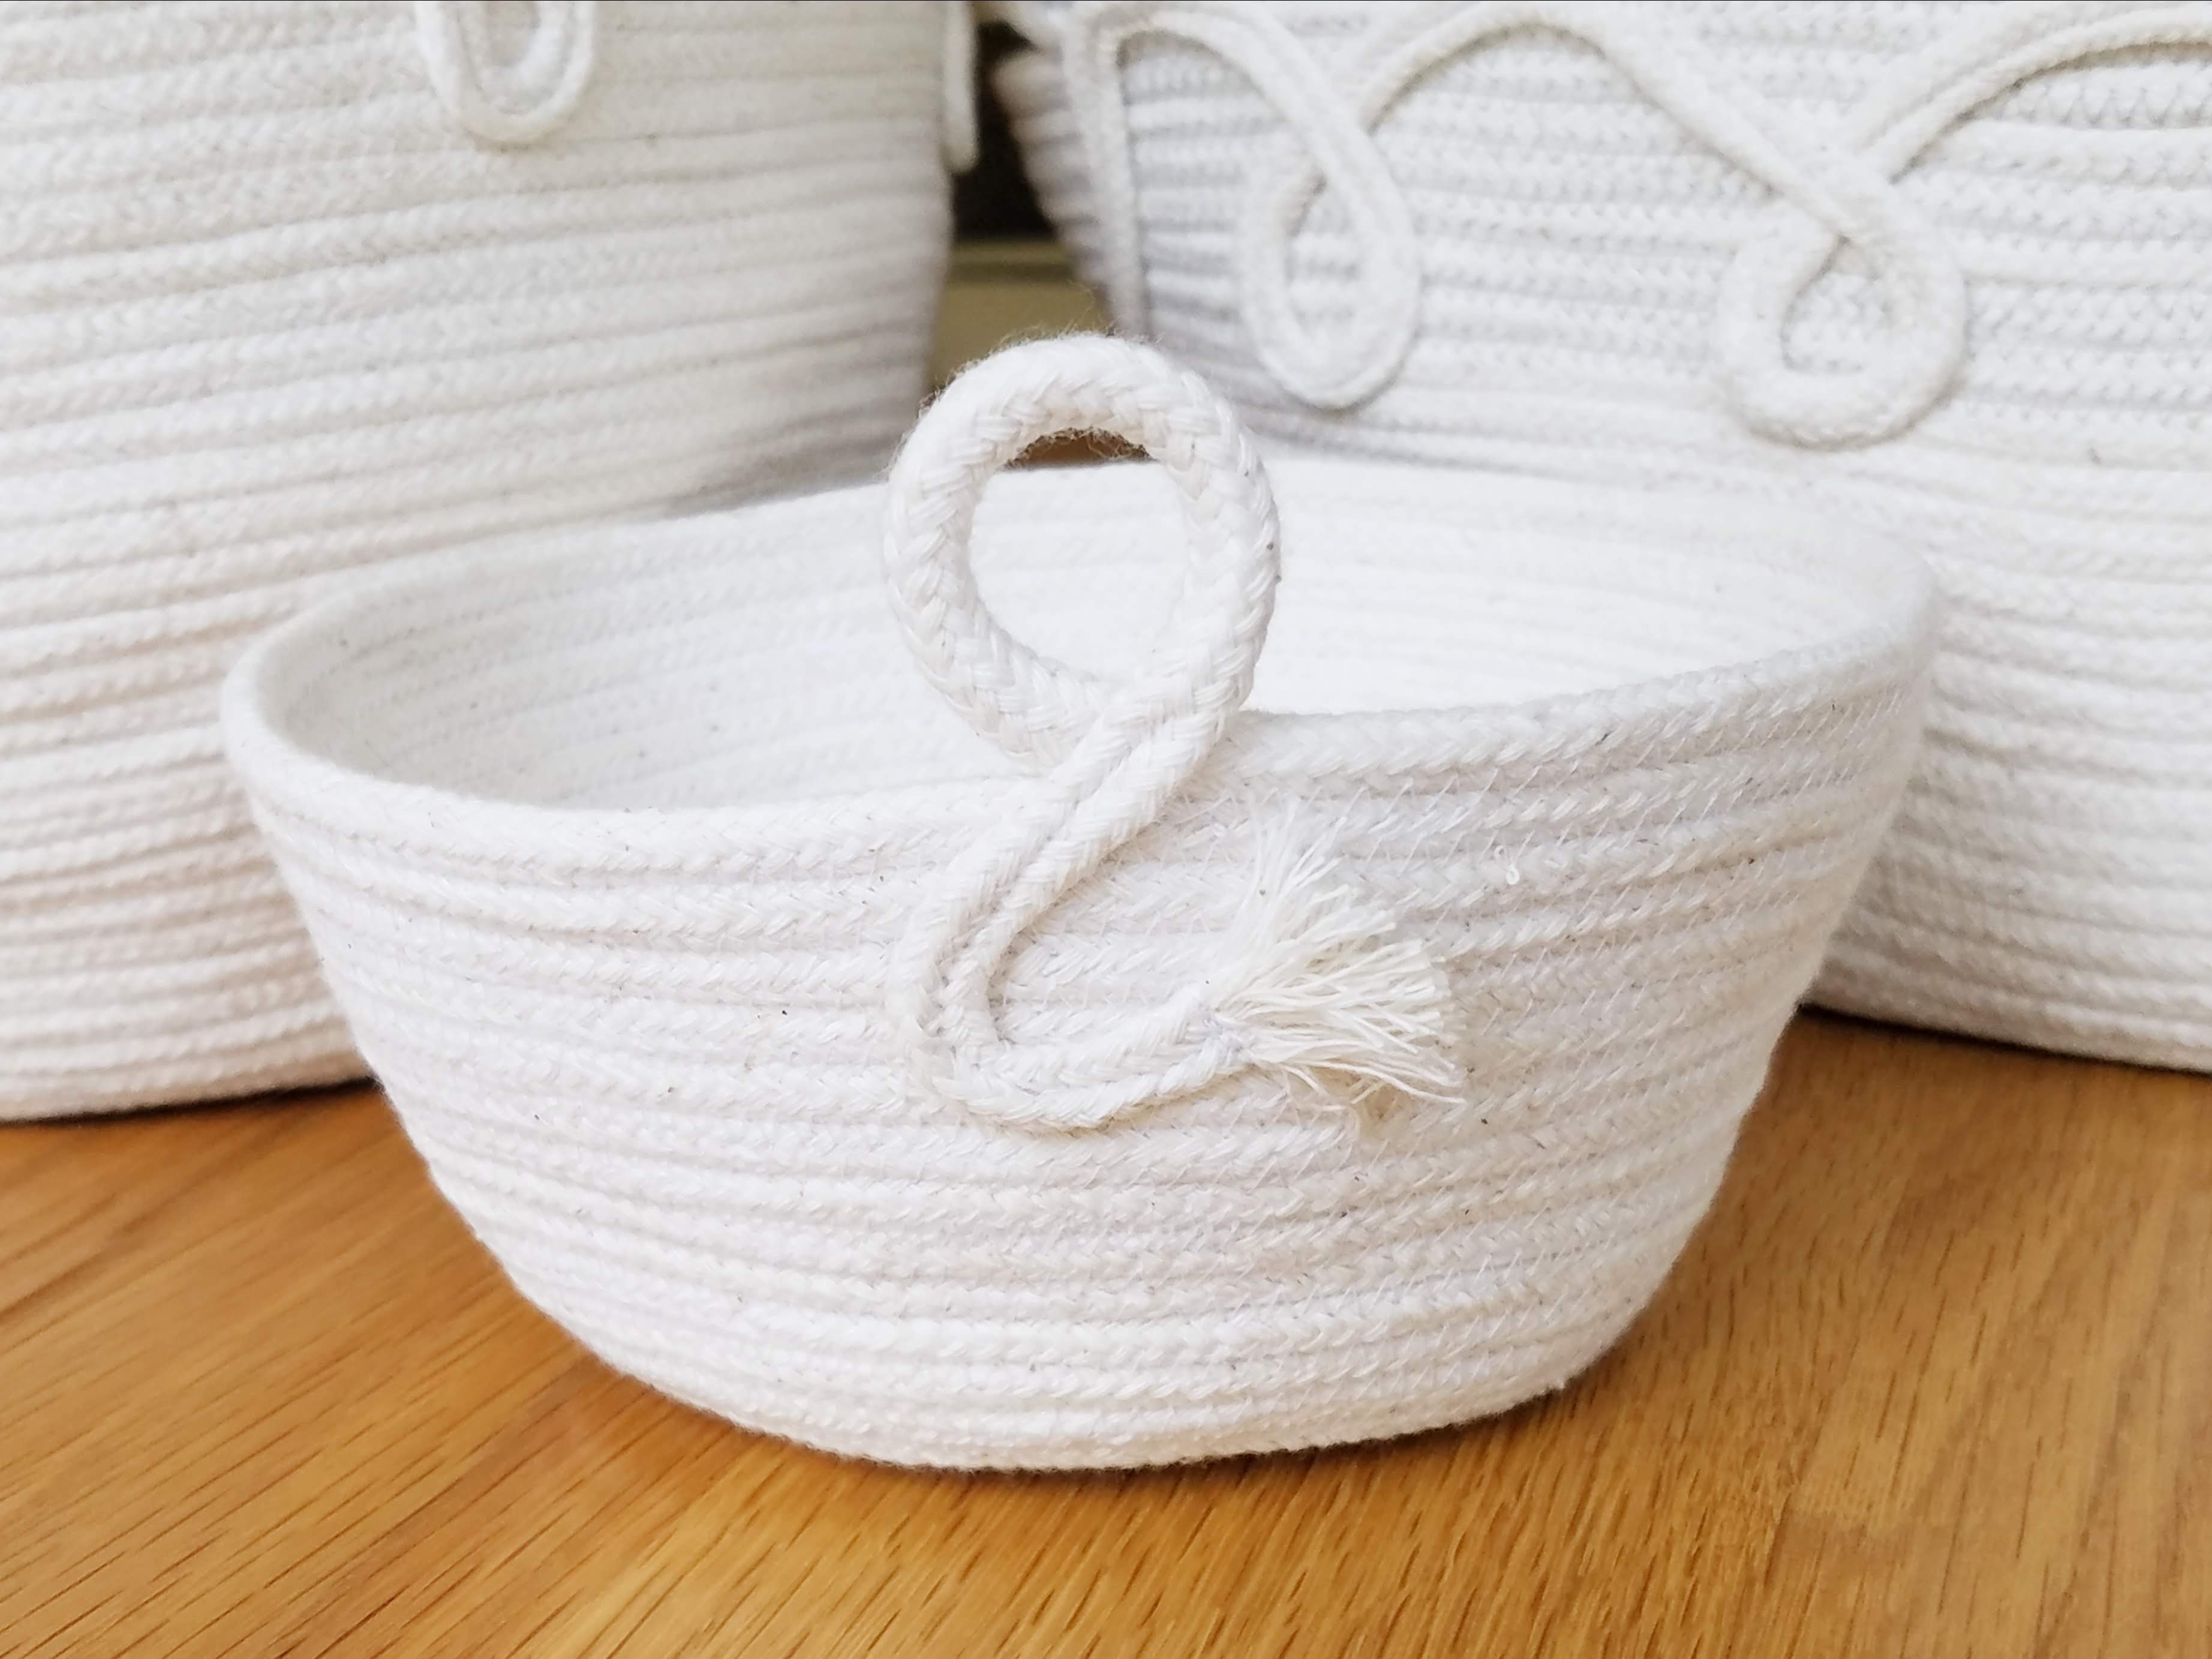
When your basket reaches a size you are happy with, you can use the end of the rope to make some interesting curlicue patterns, handles, or tassels. This was the fun part for me! I spent some time pinning the rope in a pattern that I liked, and then switched my sewing machine back to a straight stitch and sewed down the center of the rope design to hold it in place. A small loop like the one below would be perfect for hanging a basket on a wall hook. To make a tassel at the end of your design, simply sew back and forth a few times across the width of the rope, trim the rope about 1/2 inch past your line of stitching, and unravel the ends.
For now, I’ve put my baskets in the top shelves of our TV unit, where I think they look almost sculptural. There are so many things to try in the future–dying or painting the clothesline before or after sewing, using different colors of thread for the zigzag stitch, wrapping lengths of the rope with fabric, and lots of different handle designs. And the best thing about them is that they’re truly useable art. Happy crafting!


