
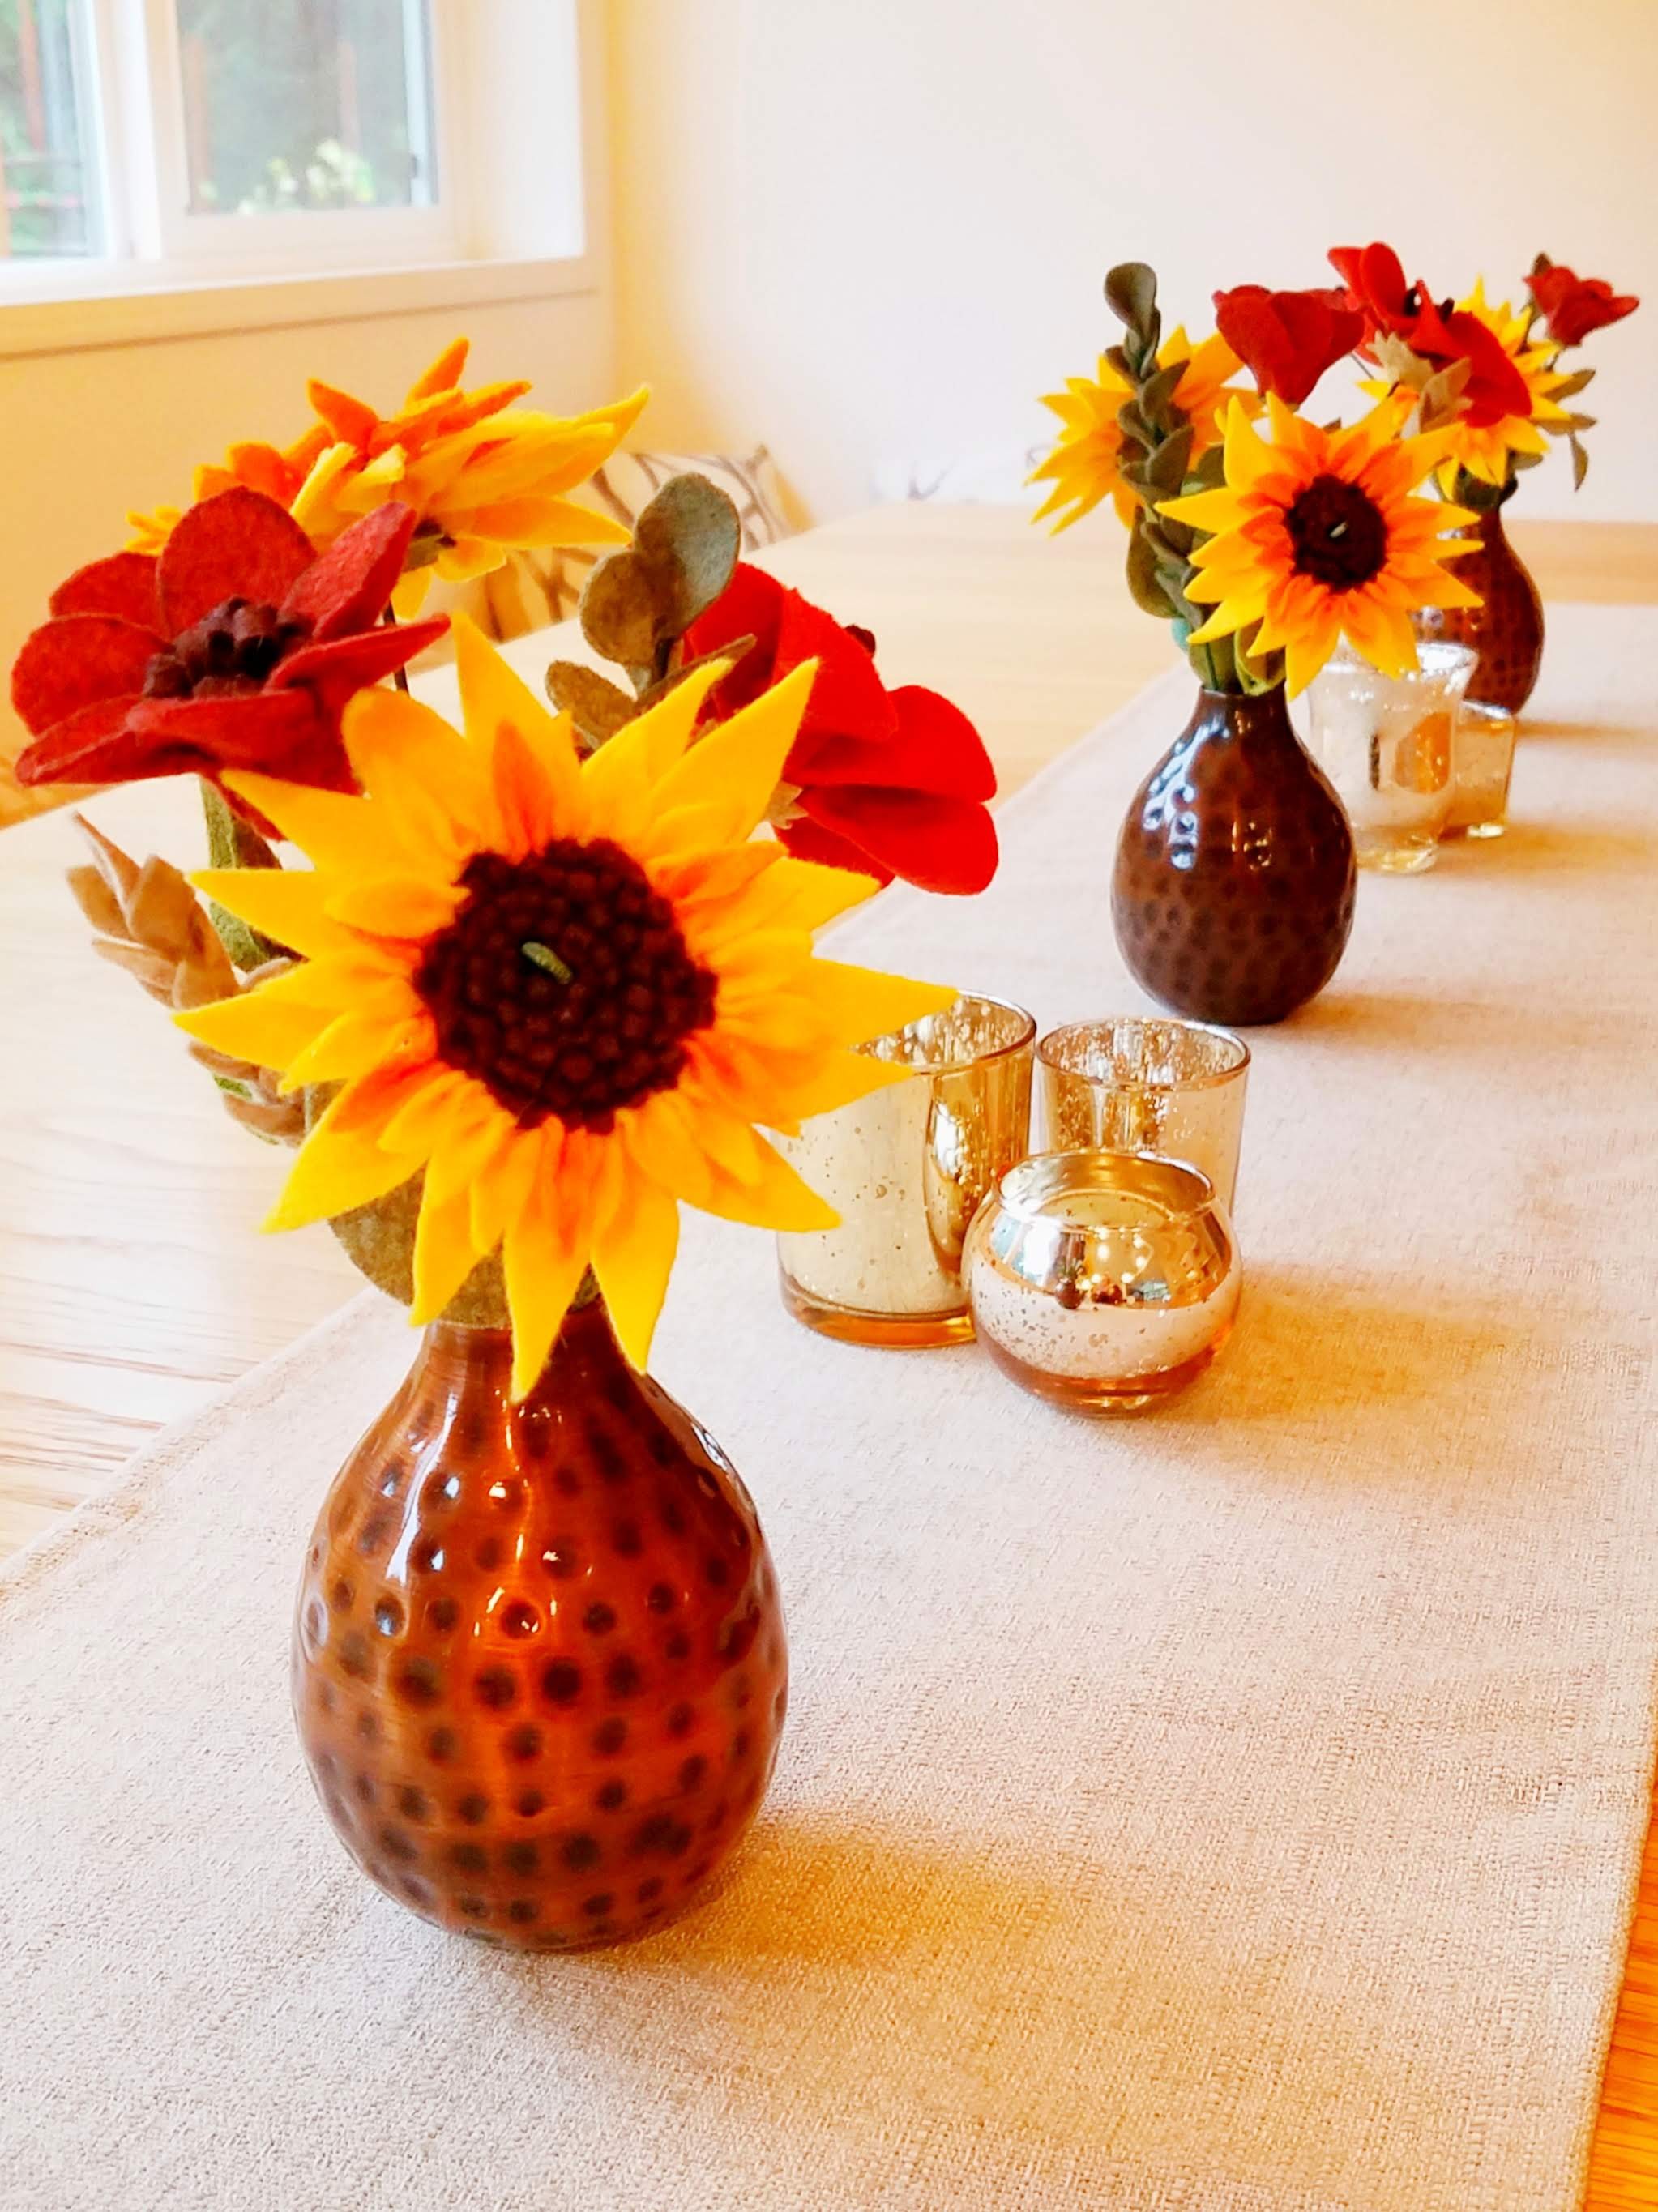
As a kid, one of my favorite things about Thanksgiving (other than the food) was arranging a beautiful centerpiece for the table. My Grandma Ginny had impeccable taste, and her house was always full of incredibly chic, earth-toned decor. We had so much fun on Thanksgiving mornings pulling out baskets, vases, and candles, and going outside to collect leaves and branches. Years later, I remember her every time I make a centerpiece for my own holiday get-togethers. She would have loved the style and colors of the felt flowers that I made for our table this year. Plus, they were super fun to make, and they don’t require any sewing–just cutting out felt shapes and gluing them in place. I think I’ll be pulling out these felt bouquets to make Grandma Ginny-inspired centerpieces for years to come.
Supplies:
Craft felt (I like Over the River Felt— they have a great variety of colors)
Wire floral stems (such as these)
Hot glue gun
Scissors
Needle nose pliers
Wire cutters
Pencil and paper

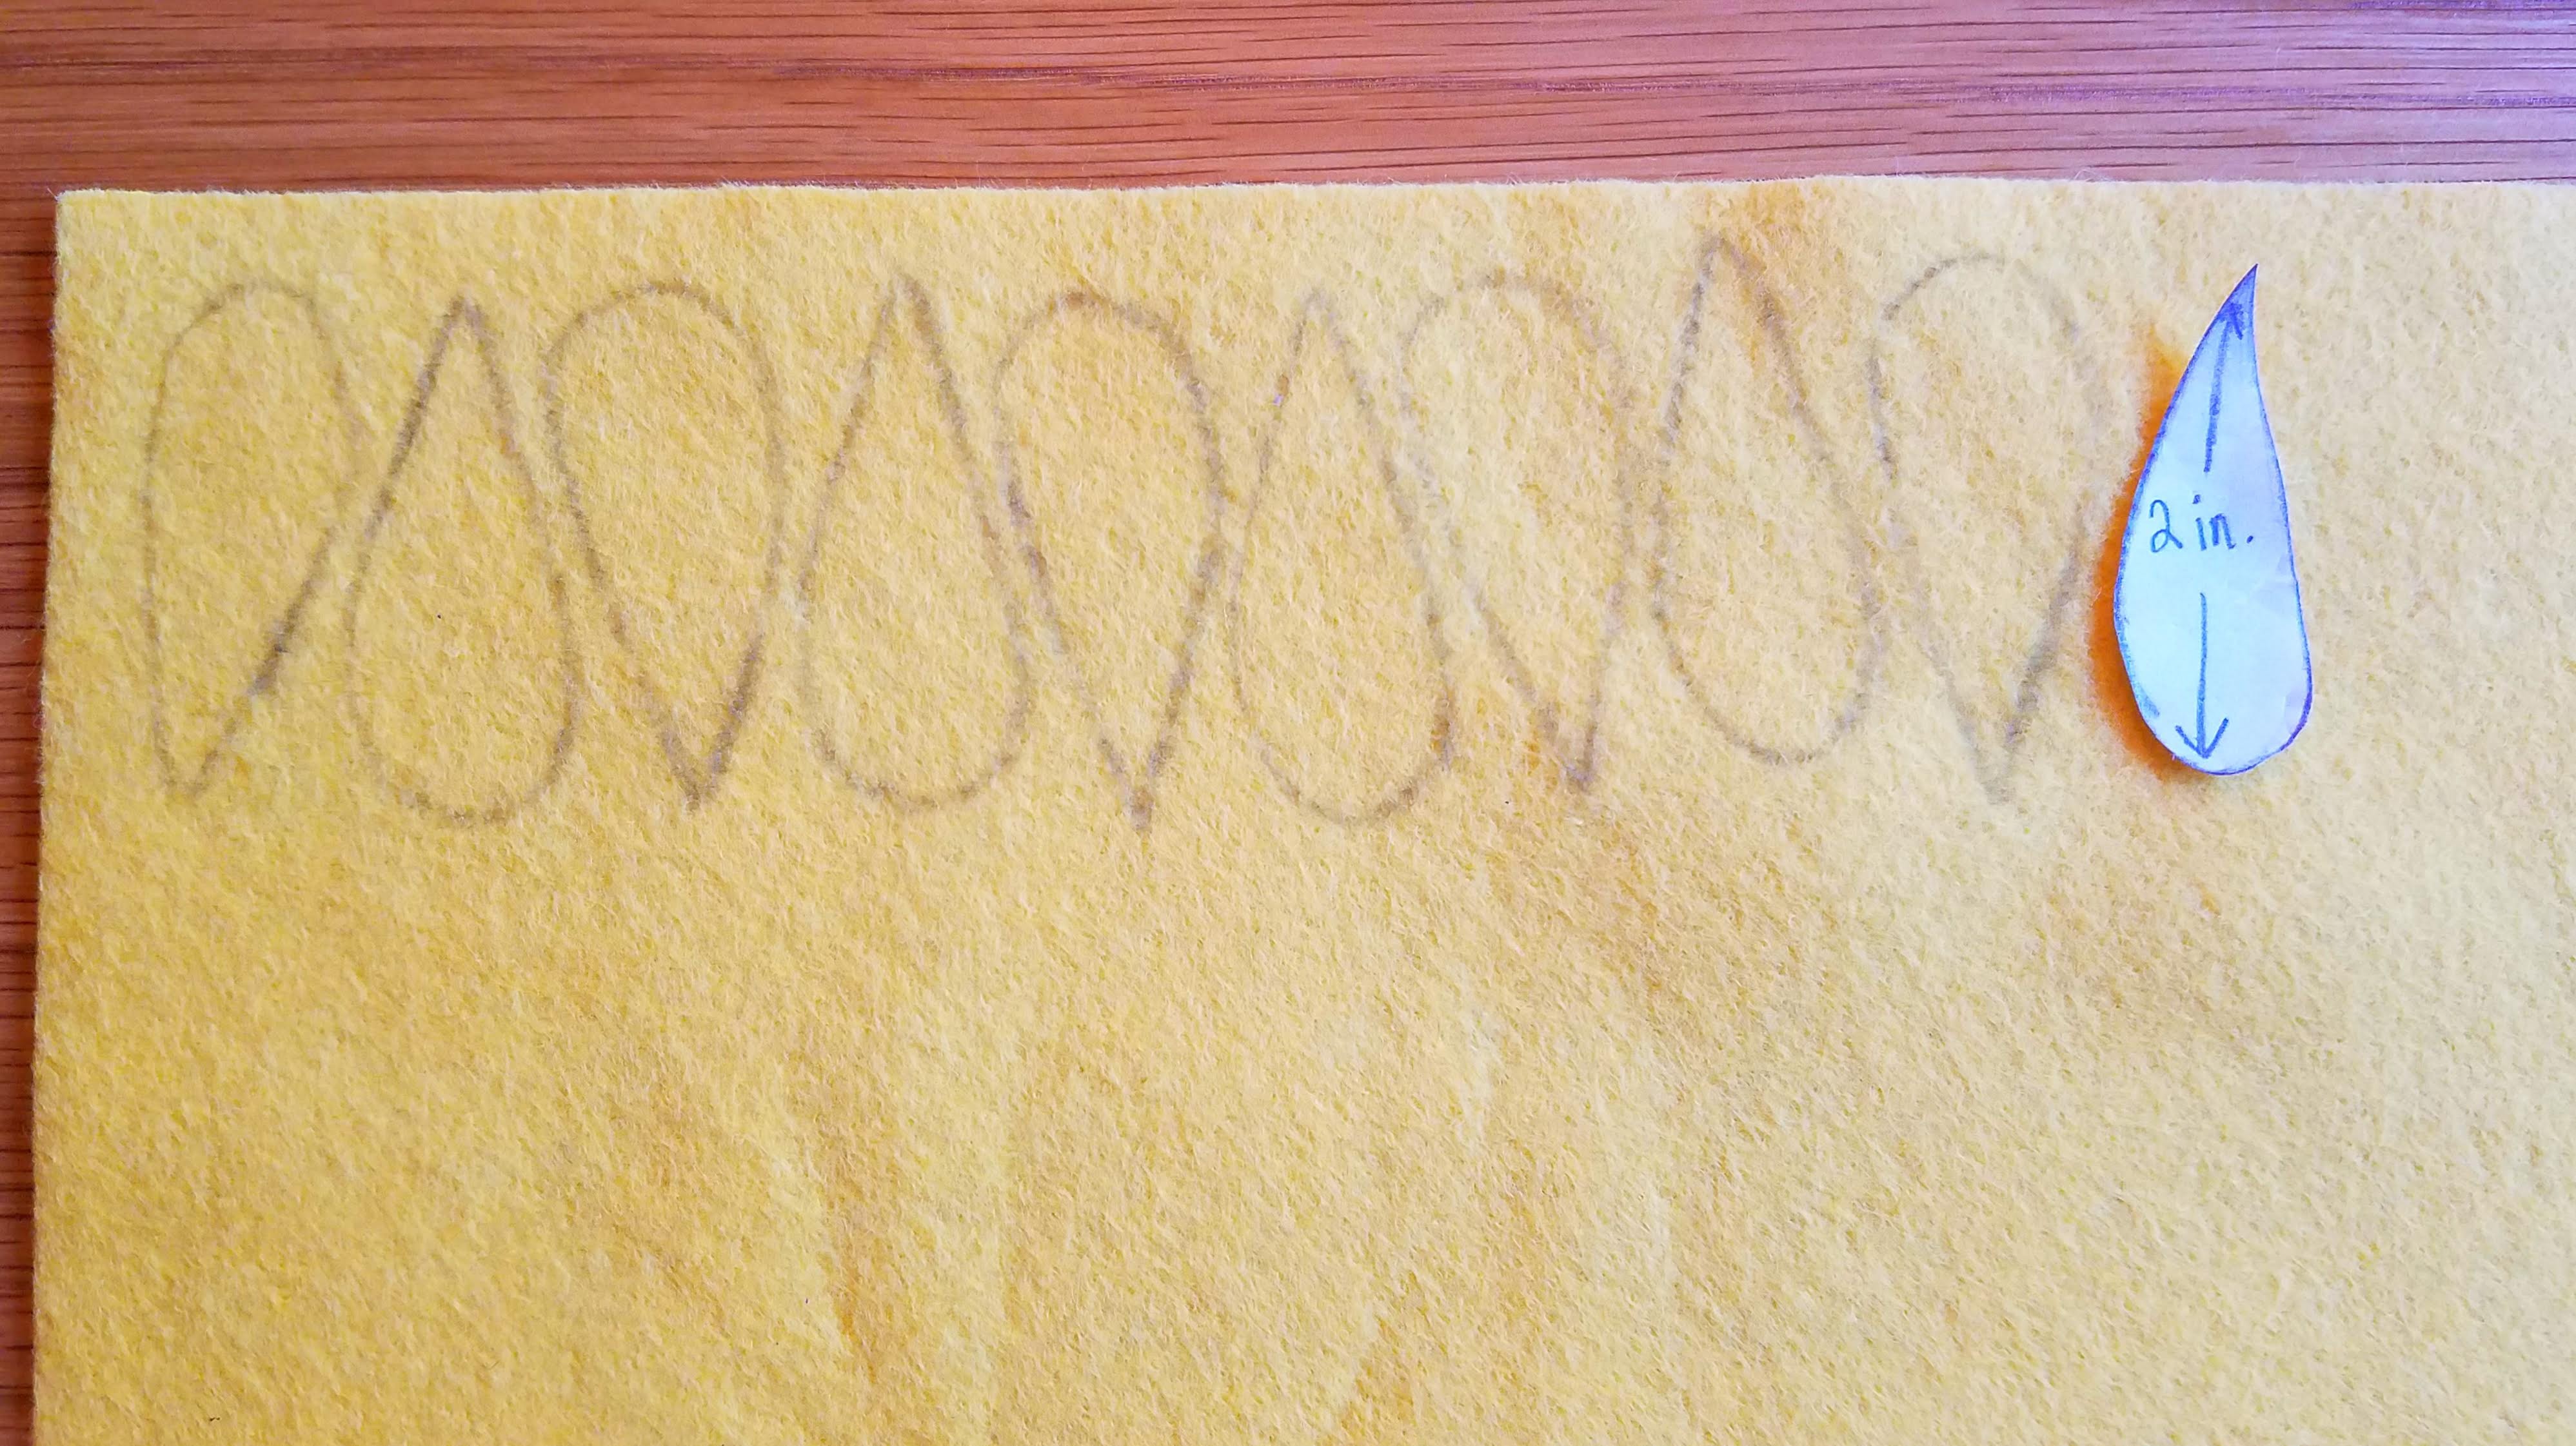
To begin, sketch out a template for your flower petals on a sheet of paper. To make the sunflowers, I used a 2-inch oblong petal and a 1-inch oblong petal. They can really be any shape you like. For a poppy, a larger, round petal works well.

Use the petal template to trace a bunch of petal shapes on your felt. For one sunflower, I used 15 to 20 large petals and 15 to 20 small petals. For one poppy, I used 8 large round petals. Cut out the petals.
Now it’s time to make the center of your flower. Cut out a strip of brown felt that is about 1.5 inches wide by 8 inches long. Using a hot glue gun, glue the strip in half lengthwise.

Now use your scissors to cut a fringe all along the folded edge of the felt. This will create the appearance of a long line of loops.
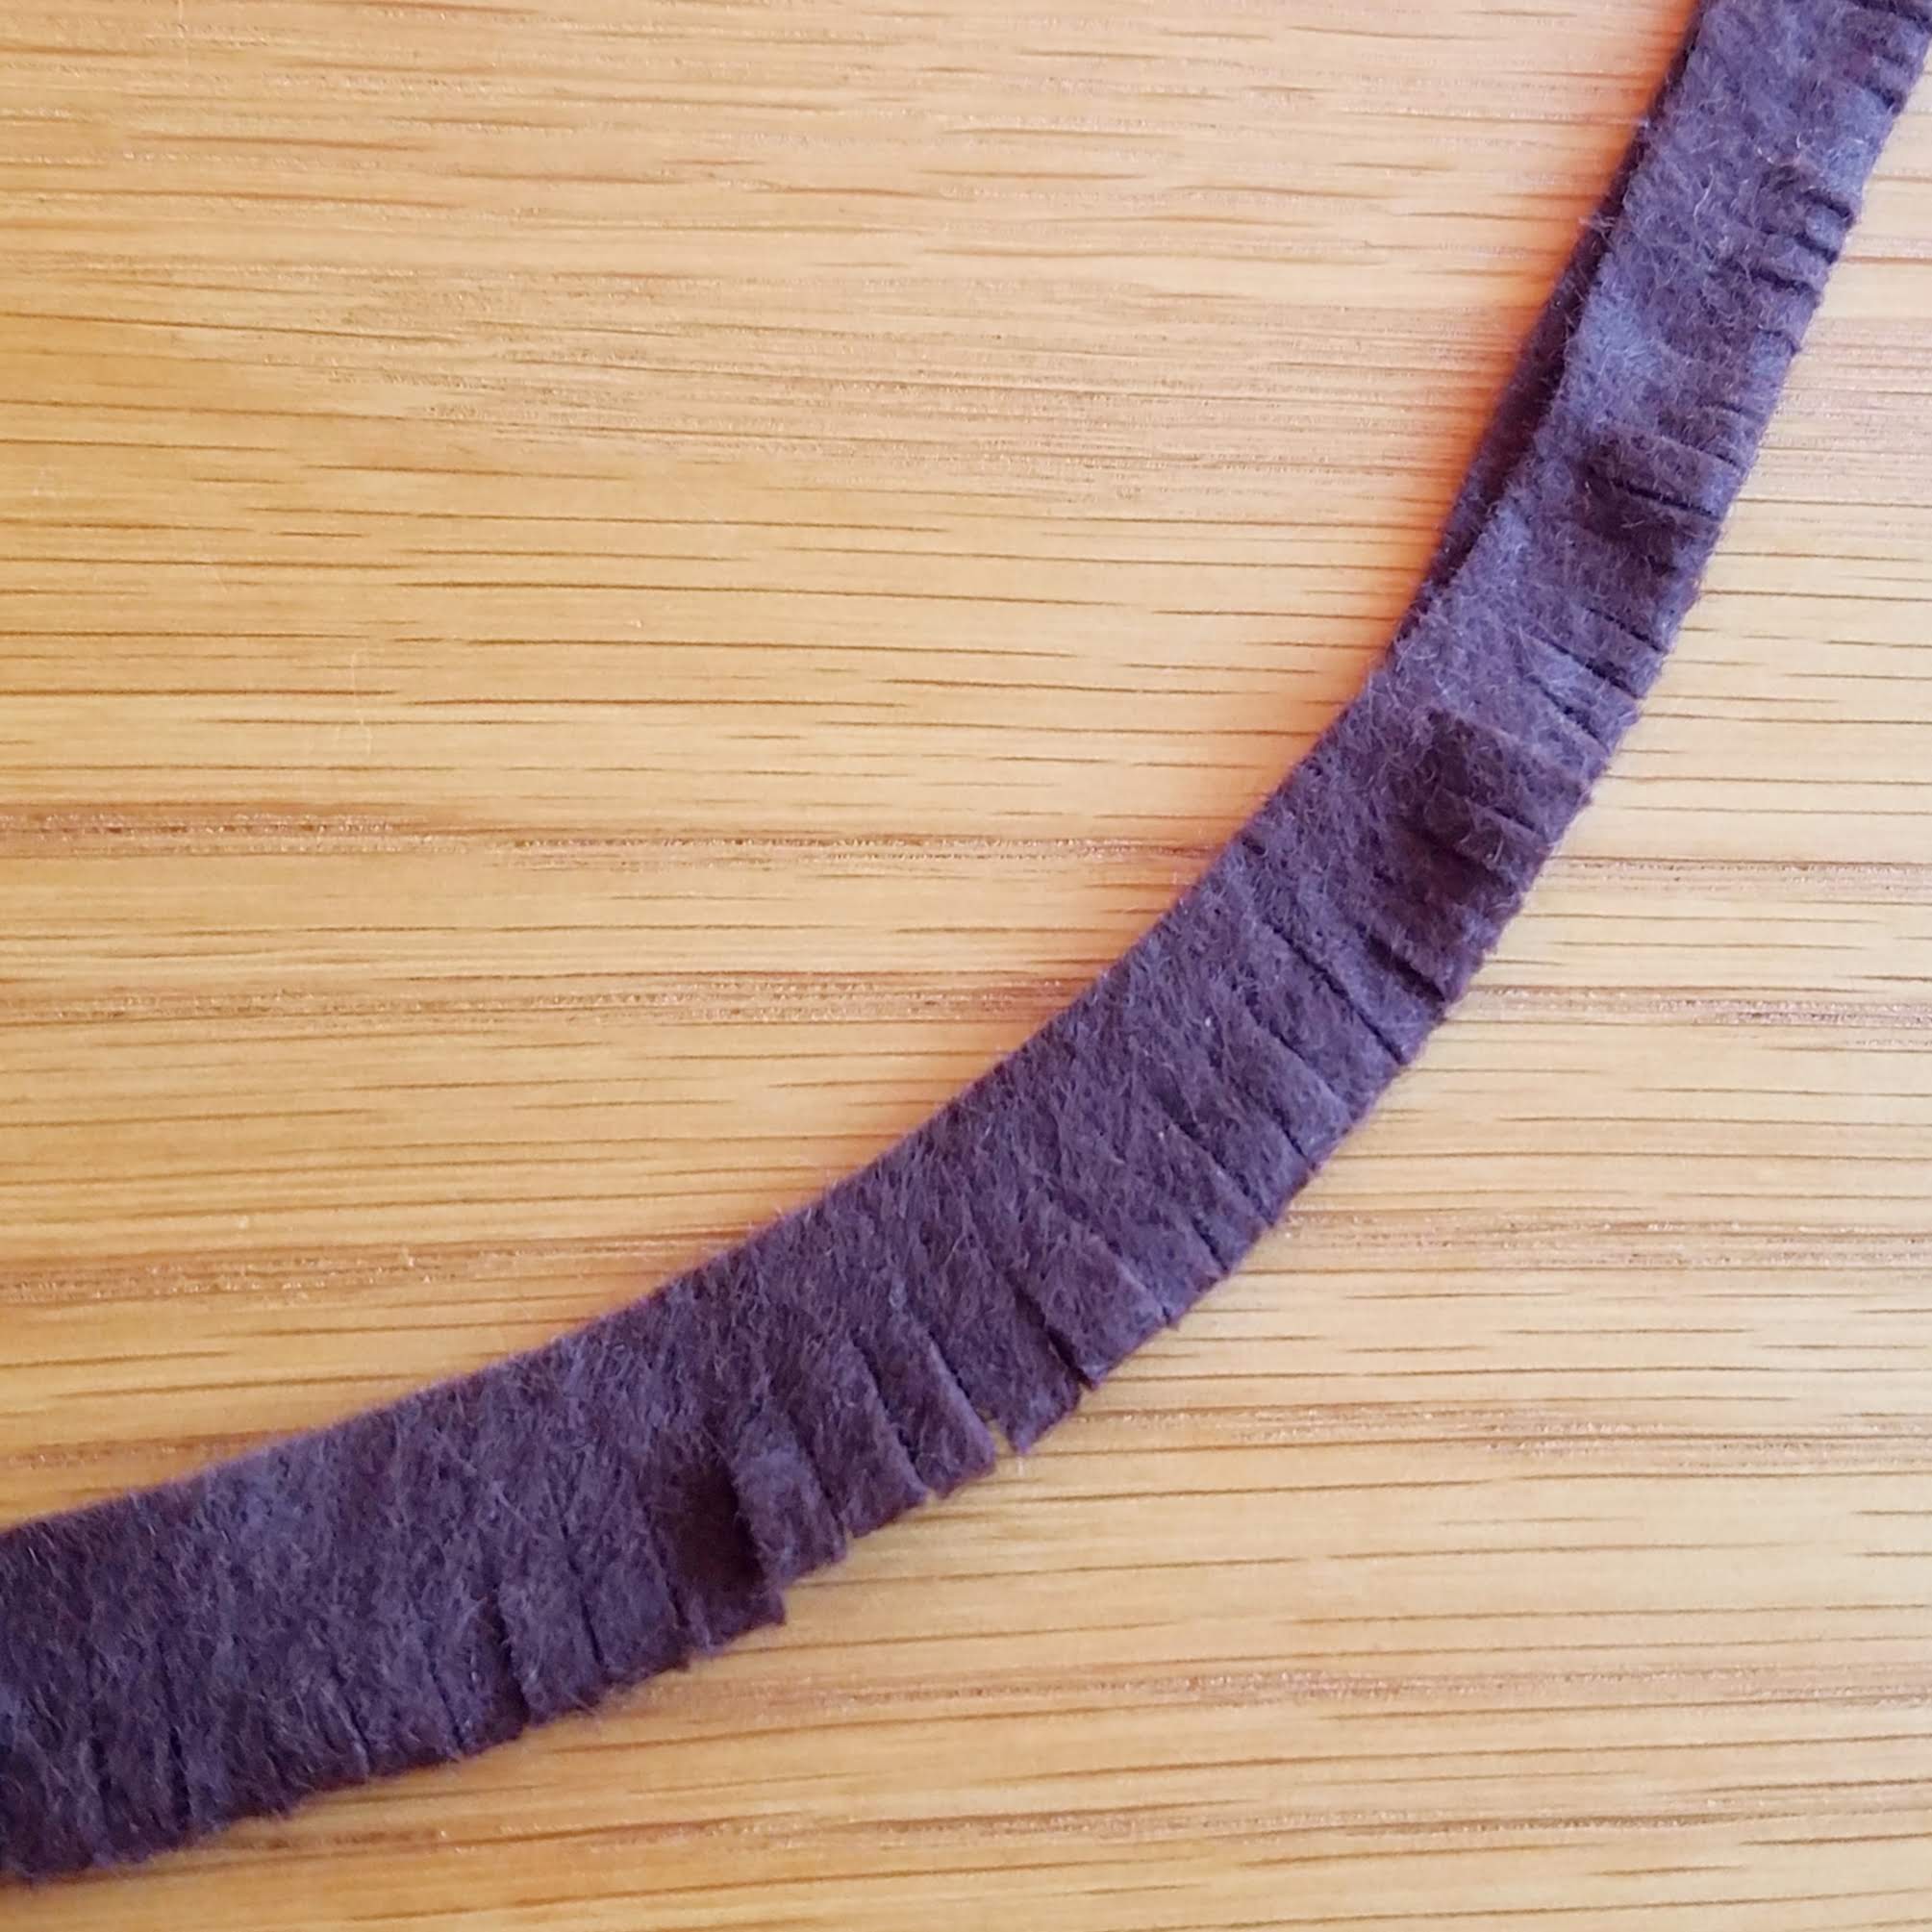
Use your hot glue gun to draw a line along the base of the strip of loops. Roll the strip up into a spiral shape to create a round center for your flower.

Poke a flower stem through the center of the spiral. Use needle nose pliers to bend the end of the wire into a loop. Push the wire loop down into your flower’s center and tack in place with hot glue if needed.

Now you will start attaching the petals. Put a short line of hot glue near the base of a petal.

Pinch the petal near the base while pressing it onto the center of the flower. The petal will have a slightly curved appearance, and the hot glue at the base will attach it to the flower’s center. Continue working your way around the flower until you have a full circle of petals. If you like, you can make a second tier of smaller petals above the first tier.

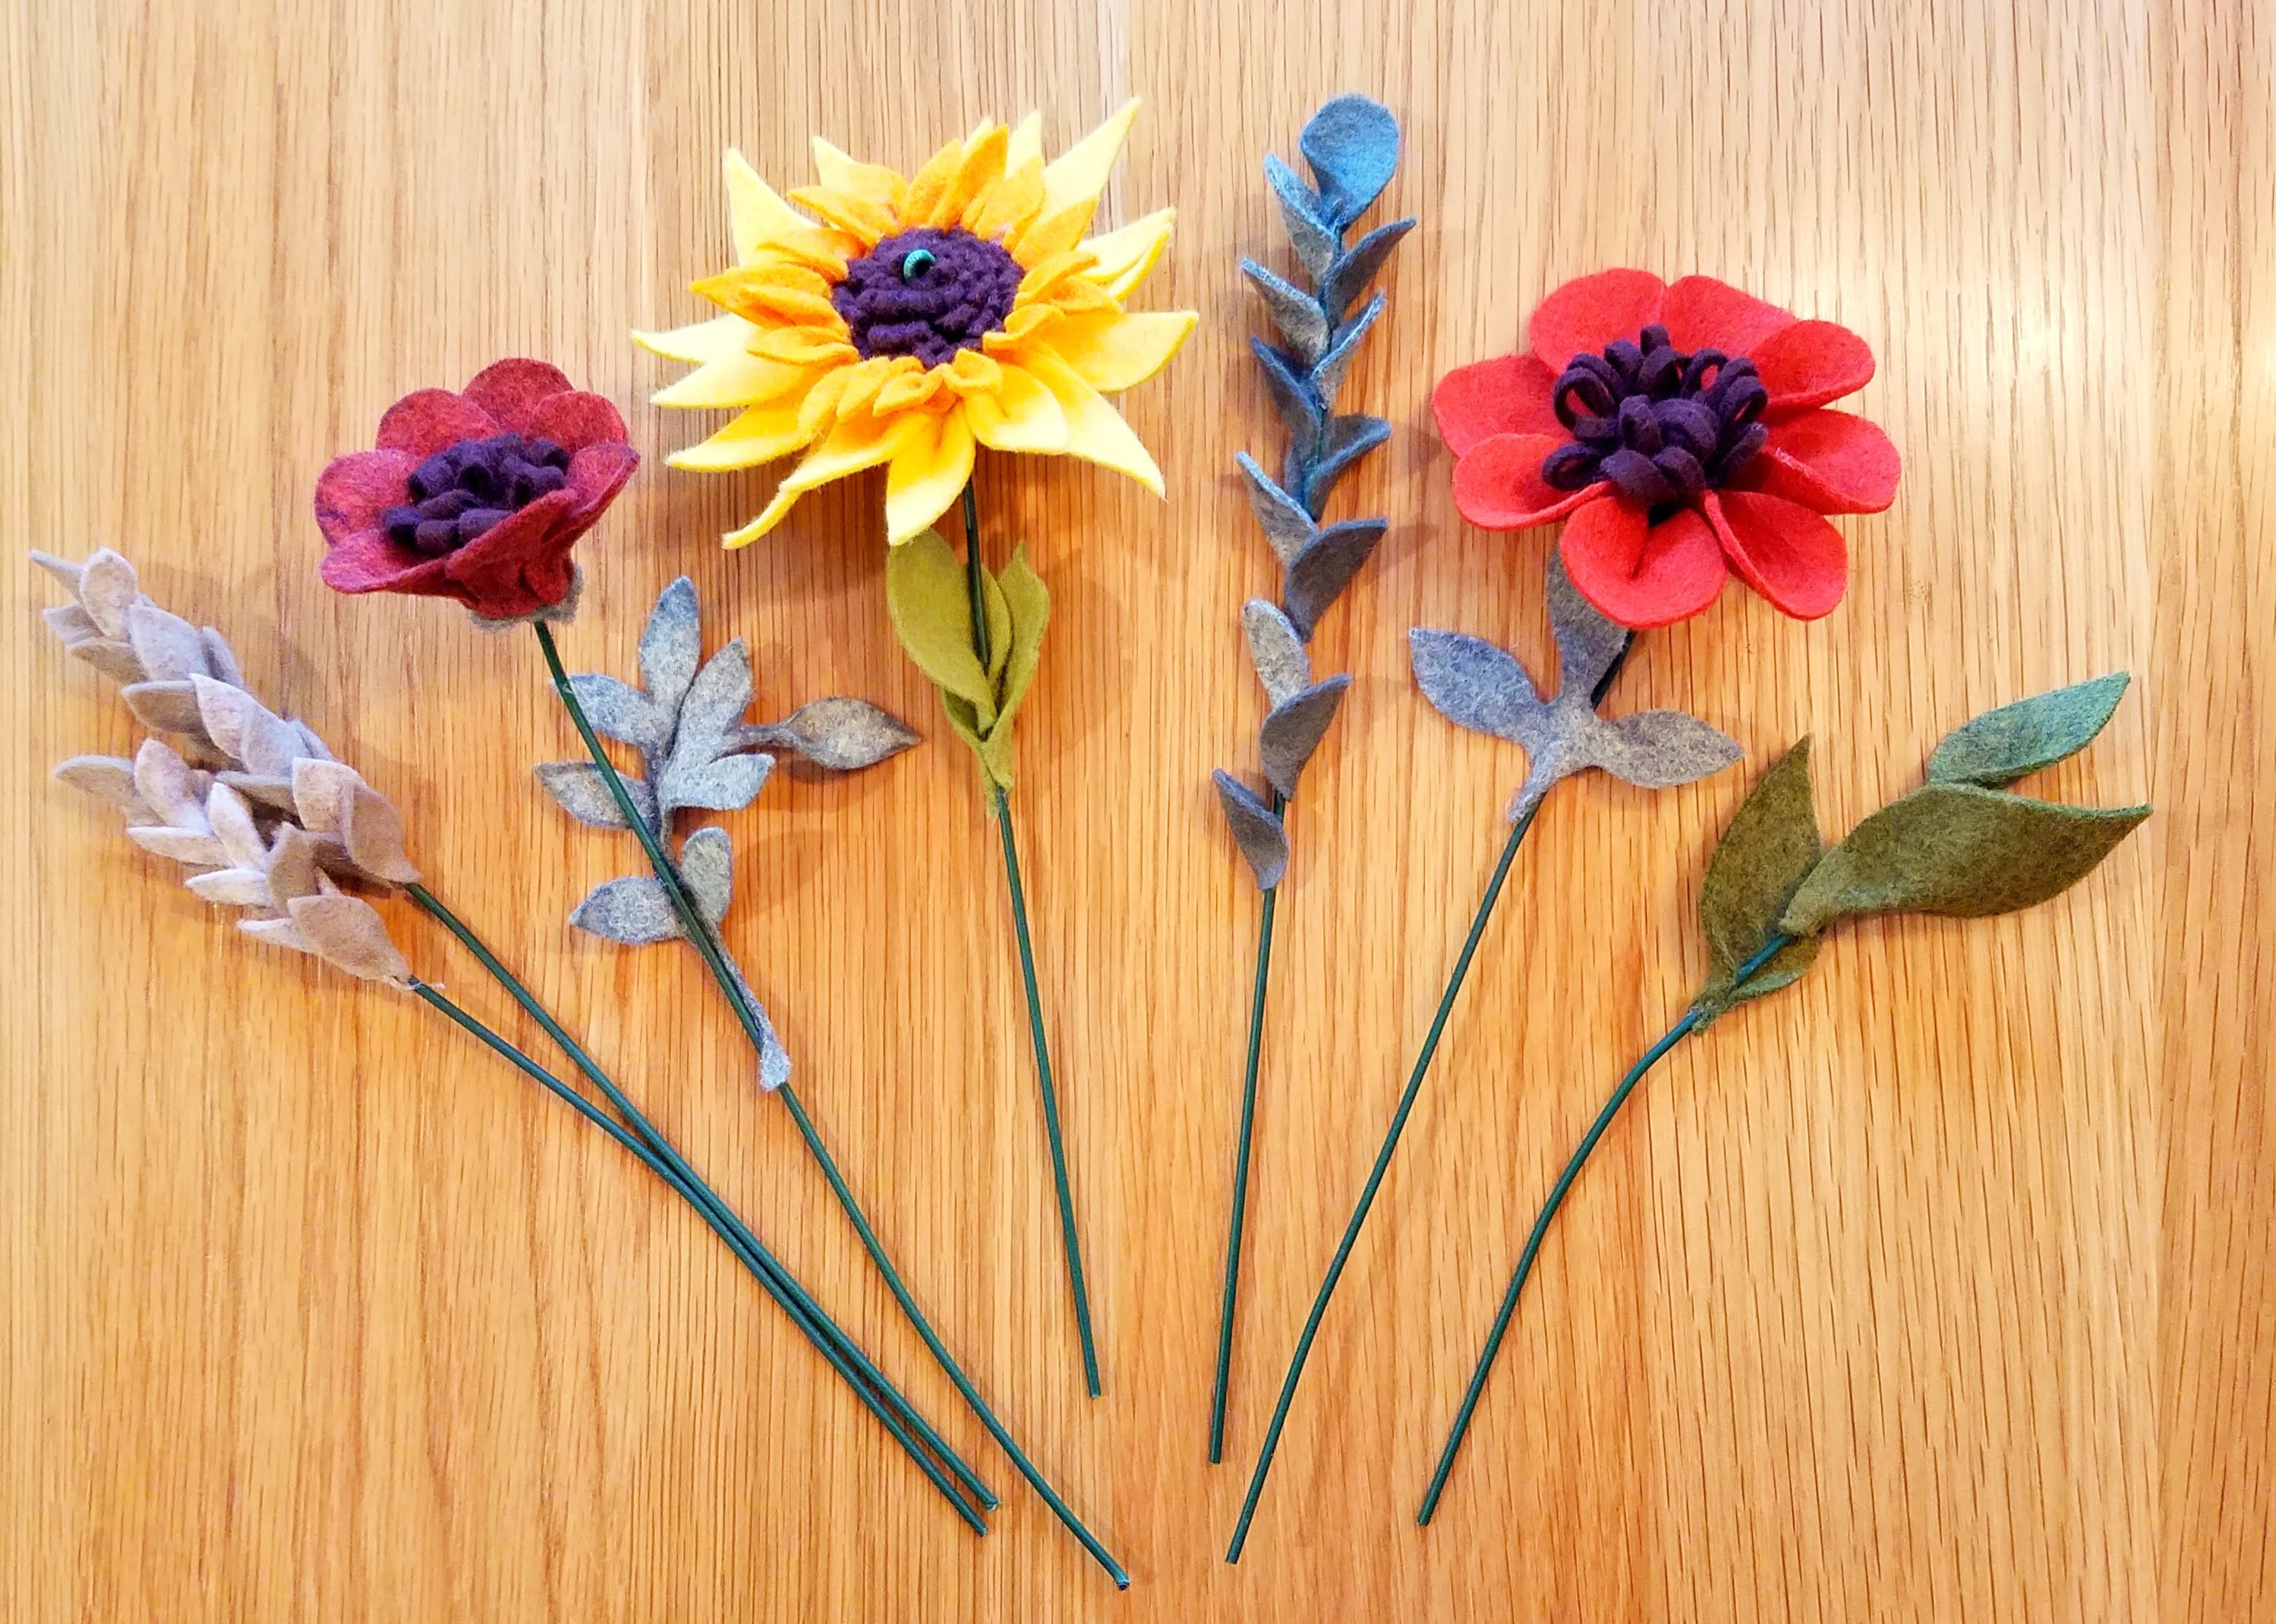
Now that your petals are in place, cut out some green leaf shapes and attach them to the stem with hot glue. Pinch them at the base while gluing to wrap them around the stem and give them a 3D appearance.

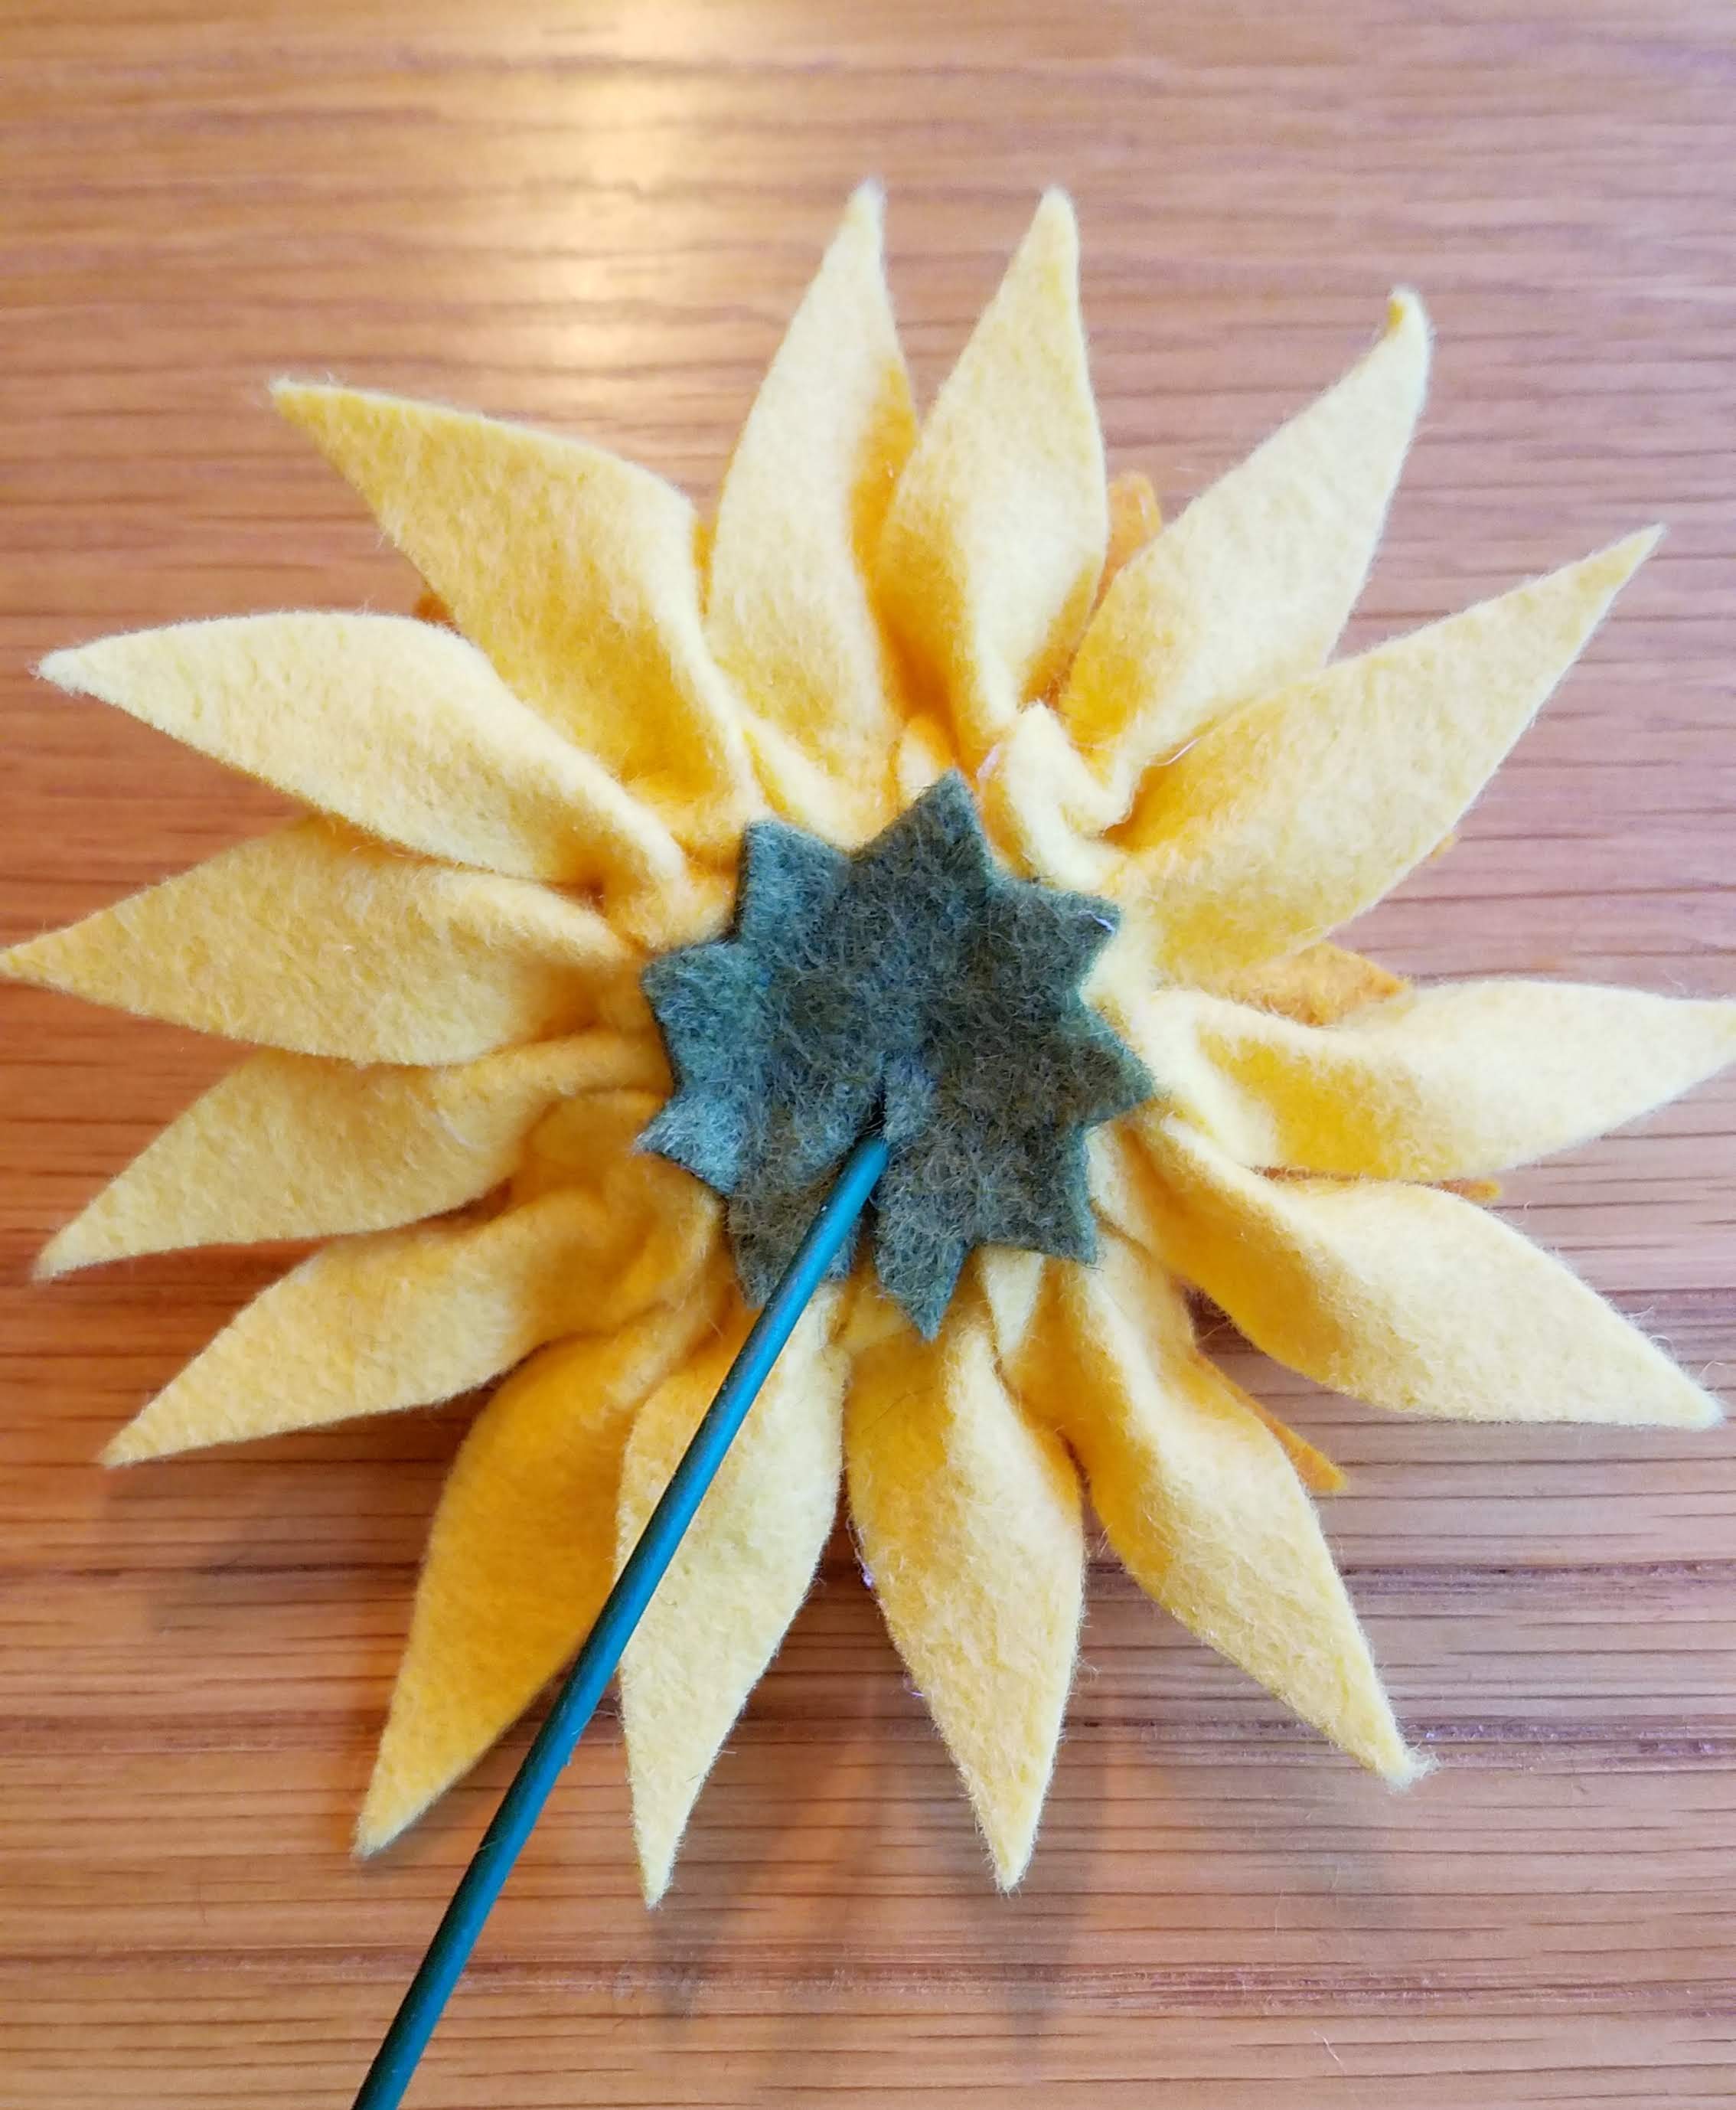
To create a clean finish on the back of your flower, cut out a green circle or star shape and cut a slit halfway into the shape.

Insert the stem into the slit and glue the green shape onto the center back of your flower. To finish the flower, use wire cutters to cut the stem to your desired length.
I made a variety of flowers for my arrangement using the above method. It’s easy to switch things up by using different colors of felt and different sizes and shapes of petals. I also made some foliage sprigs by cutting leaf shapes out of green or beige felt and gluing them onto a stem in a alternating pattern. Arrange your flowers in a vase for an artistic centerpiece.
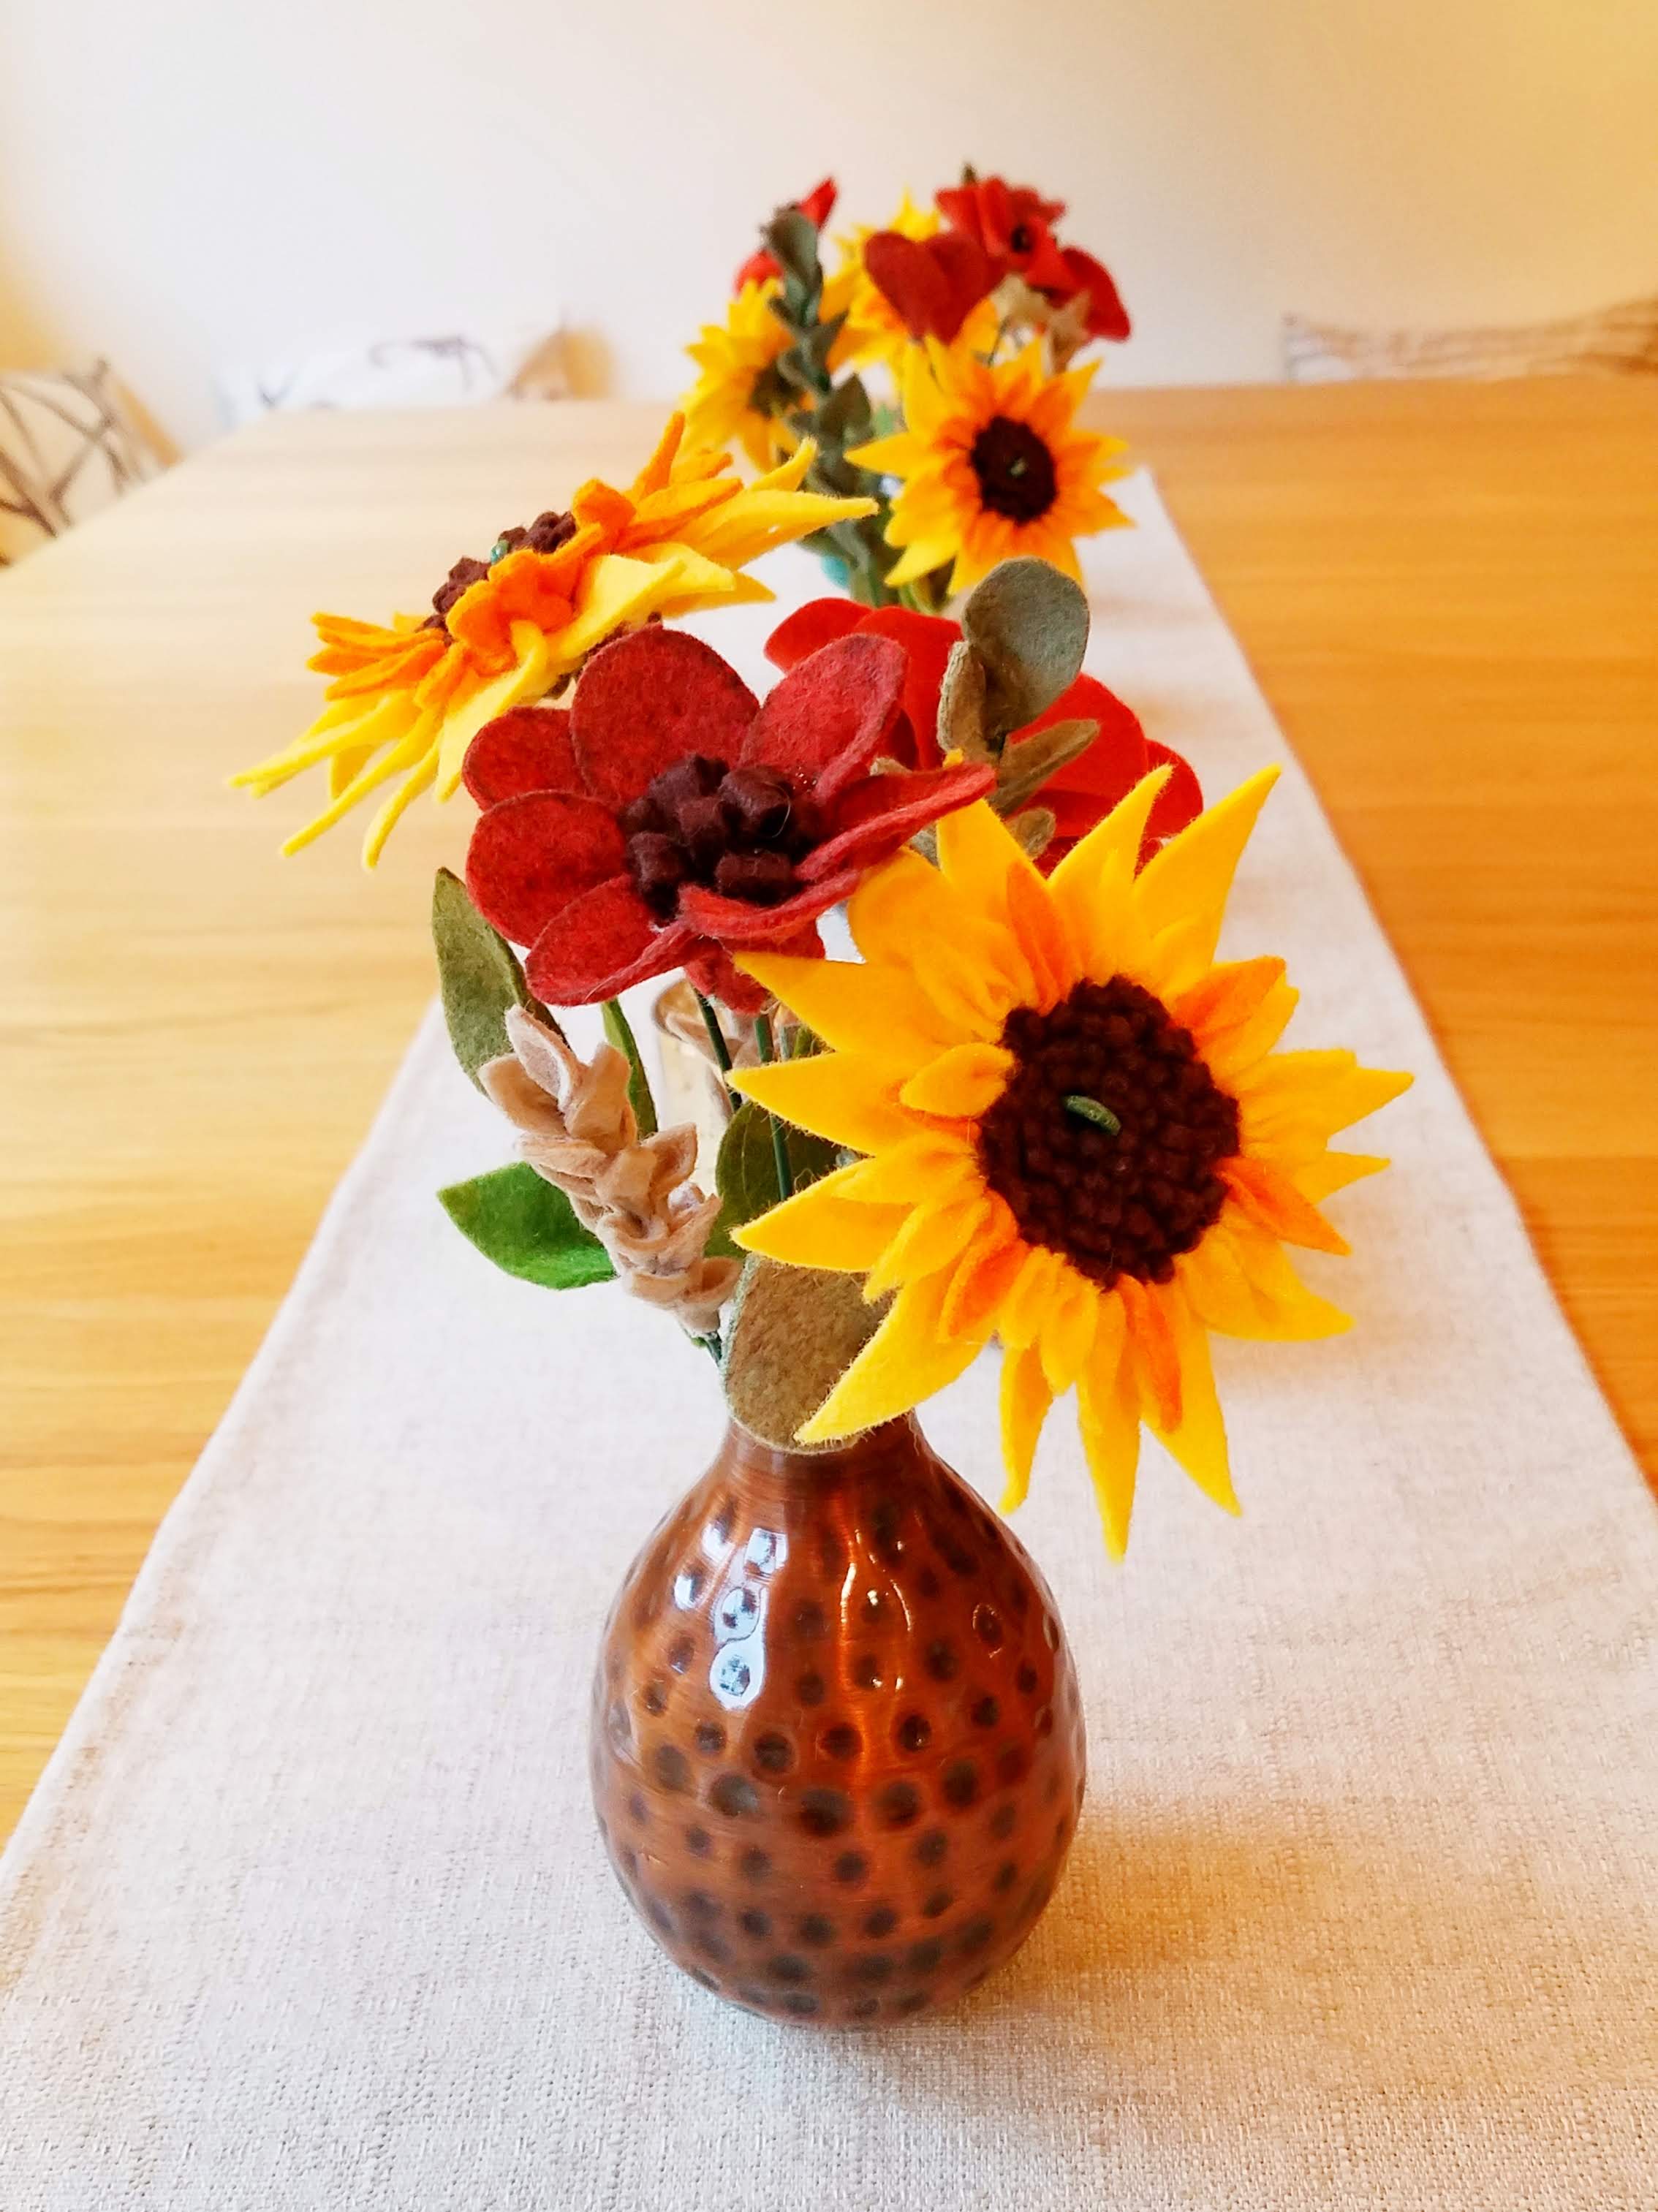

Happy Thanksgiving! I hope you have fun arranging a centerpiece for your family’s table this year 🙂

